class tasks
Gorillaz task
1) The first thing I did when making this was I added the background on to the time sequence in Adobe After Effects. I moved the background on the time sequence first so that the settings can change to fit the backgrounds quality. The background is the highest quality out of the images I used.
2) Then I extended the time of the background so that it would remain in the entire video. Next I added one of the Gorillaz heads in the folder that I was given. Using the 'position' stop watch in effects and controls I was able to keep changing the direction of the head.
3) used the rotation tool to make the head keep spinning when bouncing from place to place. This allowed me to make the head keep bouncing of the walls of the screen like the old tv screens.
I found the Gorillaz task quite easy especially since it used effects tools that I was already familiar with. But it was a nice refresher of Adobe After effects especially since the class and I had just got back from summer. It'd been a while since we had done anything on After effects so the task was a nice reminder of what software we used in the previous year. I do this was necessary for the class to experience again.

Class work on 15th September:
Creative Job roles
- Director
- Illustrayor
- makeup artist
- Architect
- Actor
- Artist (painter)
- Author
- Writer (movie)
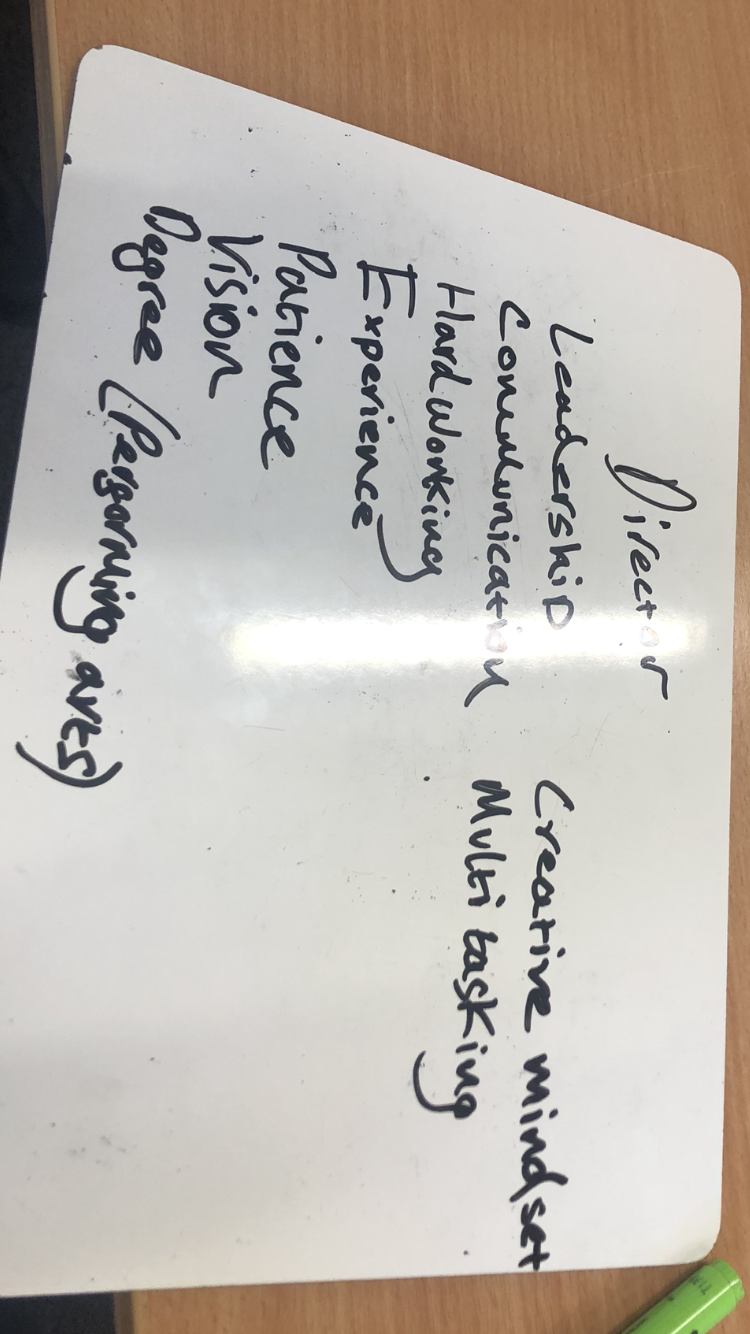
(Class task) Pick a job role and list the qualities a that role must have:
Every group had to list the skills needed for the different job roles we picked. The most common skill was communication. Most jobs require people to work as a team or gather information from a client or even a work mate. A director has to have a lot of qualities but communication is probably one of the most important skills to have as you have to lead teams of people to try and get what you want.
Premiere Pro book marking
Transitions are important in music videos. In this task we were taught on time cuts with the beat using the book mark tool. When watching through the video I could tap the key 'B'. By doing this I set a bookmark on to the time line, this is useful because I can tap it when the beats hit allowing me to make a nice timed transition.
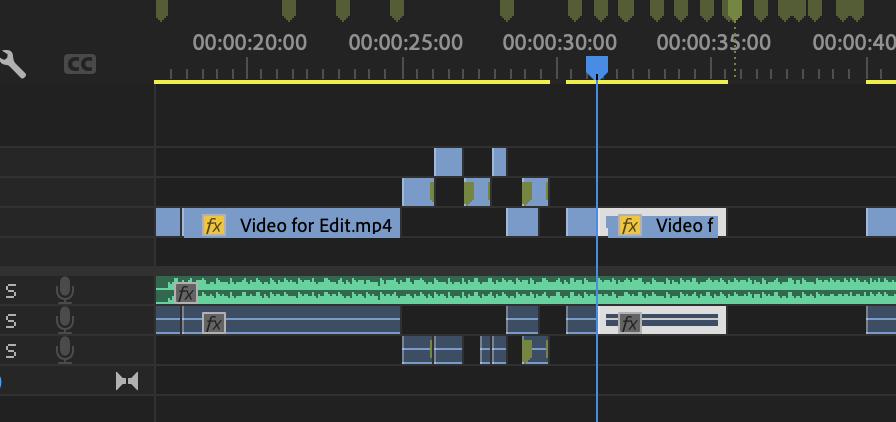
Marking and cutting to the beat is something that I will do no matter what style my music video will be. I think this is a crucial tool that will help make my video look more professional.

This task on using the bookmarks will come in very handy for our music videos. Having random cuts in videos is very annoying and to have us time these different shots to the beats is really helpful. In my opinion this will be a crucial skill for the class if they want to achieve a distinction grade. If you watch a lot of professional music videos the edits are mostly timed to the beats. In this project we will have to try and get our music videos as close to those videos as possible. In this project I'm going to be more ambitious and include more of these simple tools. I really do think this is something that I will use throughout this project.
Multi-cam task
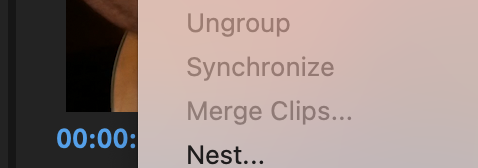
In this task I had to out together a video with three different perspectives of a band performing with the music. The first thing i did was download all the content I needed. I then synchronised the music with all three of the clips. Next I used the eye tool on each of the clips to see what the music looked like with and without each of the clips. I used the bookmark tool to also choose when I wanted to switch in to a different clip. Usually I would focus on to one of the performers if they were going off with a solo. I really enjoyed this task and I had fun watching the performance over and over.
When editing the video I decided to keep the cut take at the start. I just thought it was a cool moment that I wanted to leave in.
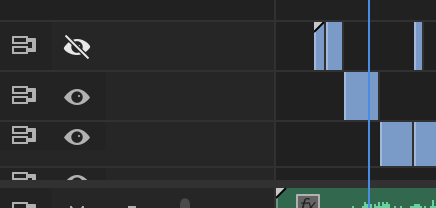
Again I used the bookmark tool on watch of the singer when I felt like there was a certain beat in the song kicked or if I felt like one of the musicians was having a moment when playing the guitar. I said in a previous skill about the book mark that it would be crucial and it really is. It's so simple yet so helpful.
This task gave me an idea of what it'll be like when gathering all of my footage for my music video. I think it will be easier in someways when editing my one as I'll have more footage to work with and cut to. it will take more time probably compared to this task where I only had three perspectives but I think this task has given me a better understanding for future tasks.
Multi camera production vs single camera production
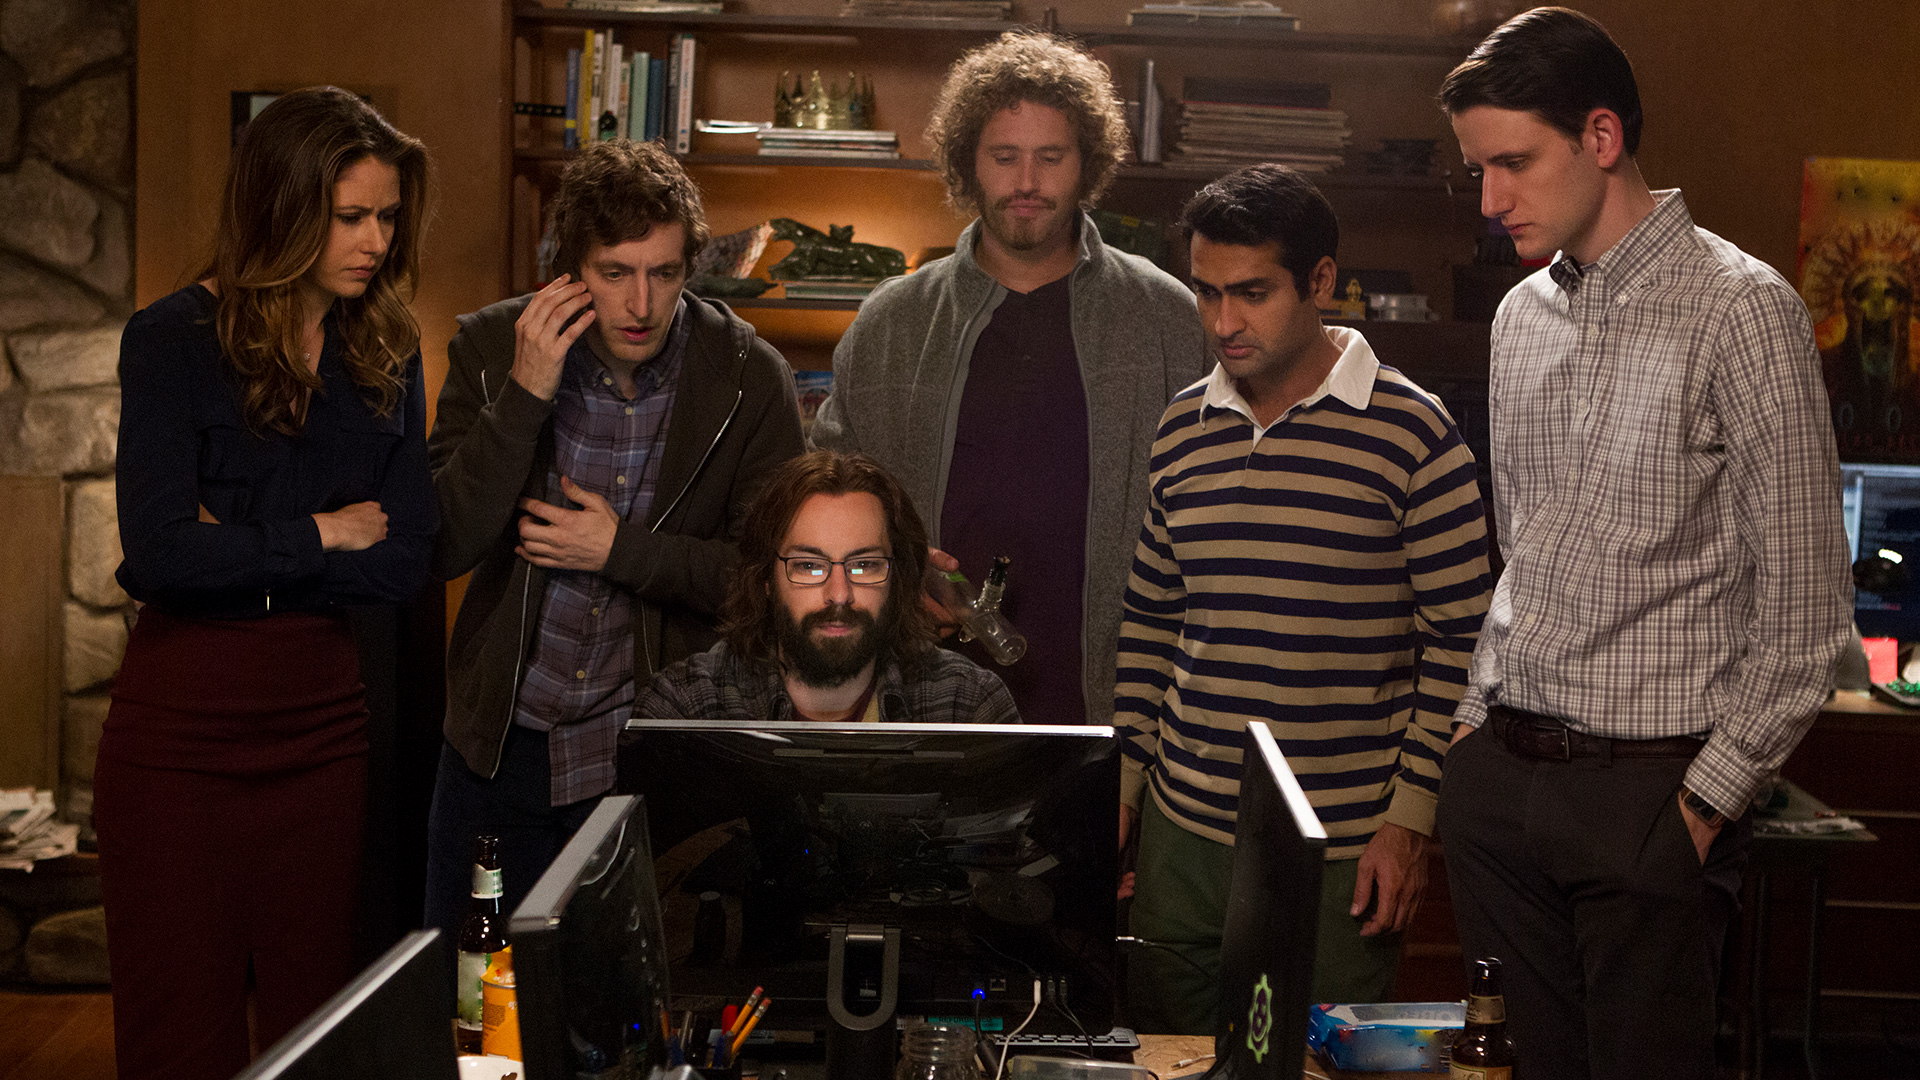
Single camera production - An example of a single camera production is Silicon Valley. Silicon is a sitcom tv show. Using a single camera can make a lot of shows feel like you're seeing it from the characters perspectives as the camera is constantly just focusing on the characters in the spotlight. This format can make the viewing experience more realistic as some show carry the cameras during a performance. Silicon Valley does this but one of the most famous examples is the office.
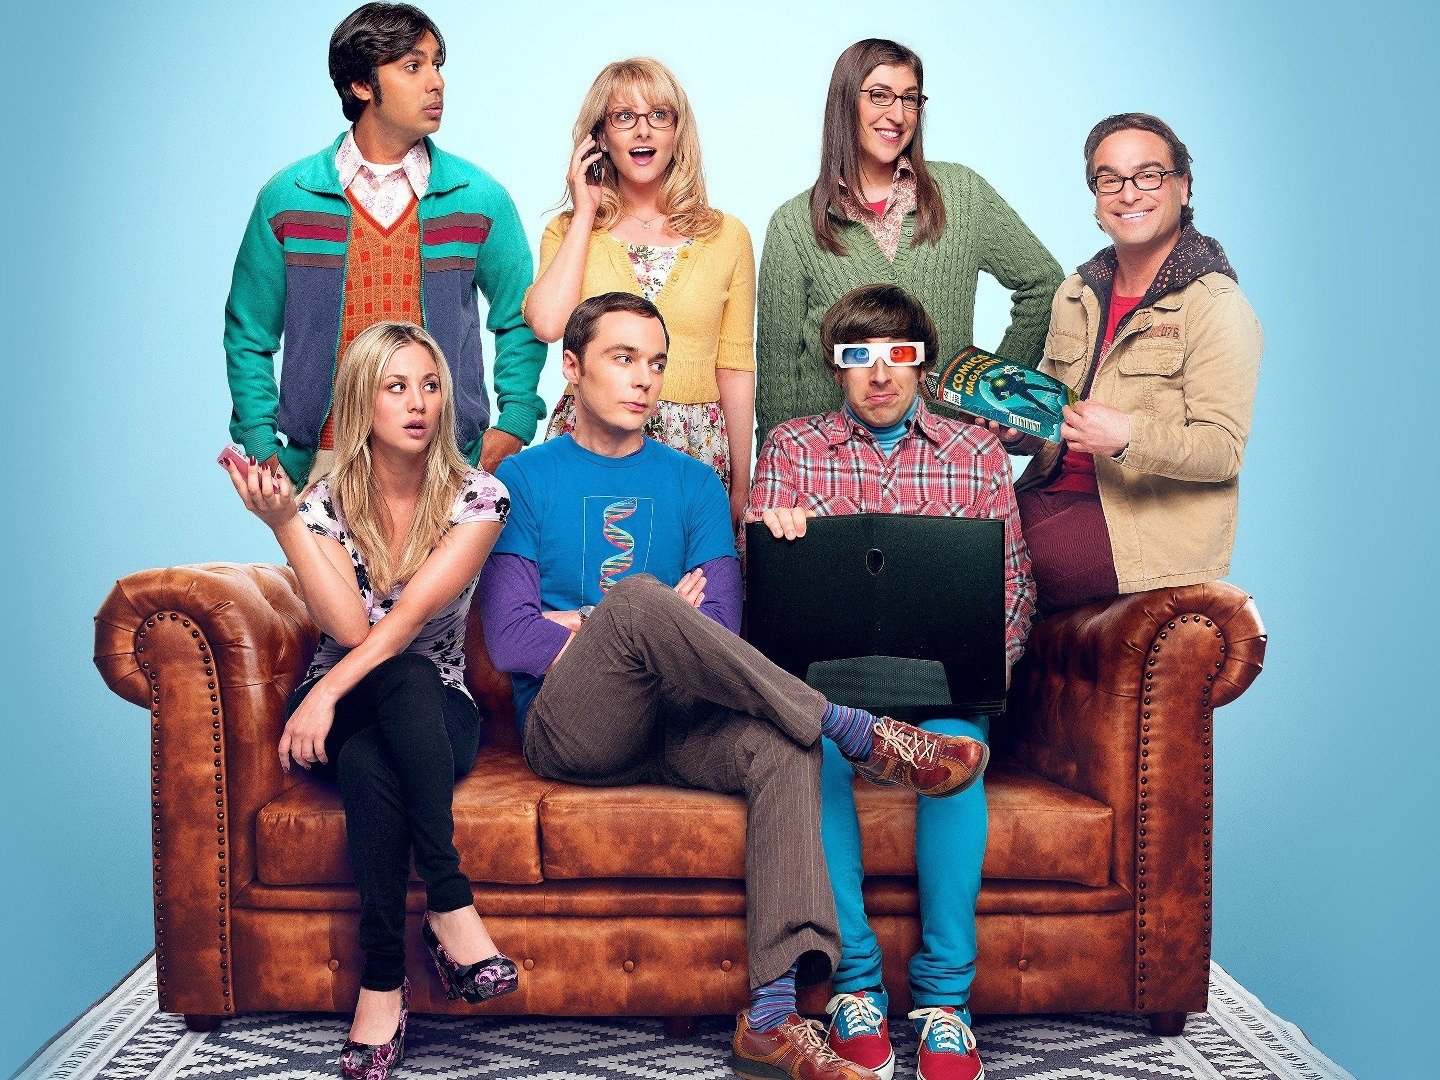
Multi camera production - The big bang theory is a sitcom which uses this multi camera production. There is a stage with props where the actors go on to perform. There is also an audience behind the cameras. The camera format really helps as when there's a new actor walking on stage. It can gather the necessary footage of a character walking on stage while also capturing reactions form the other actors.
Monochrome task
In the thriller music video by Michael Jackson there's a theme of colours being used. The video has a horror style. To bring out this horror aspect the video has chosen to use a lot of blues and greys, these colours usually associate with coldness. these colours resonate really well when it comes to terror. This is noticeable when the zombies star appearing in the video.

Michael Jackson is wearing his famous red suit in this video. The red can bring out intense emotions. This compliments theme of horror really well. A lot of the choreography is also fast and intense which adds to the choice of theme and colours. I really like the music video as a whole, it definitely gets your heart racing with the constant movement and use of horror.
I think it's important to look at the importance of colour. Every colour has the power to convey emotion and bringing this out in my music video will be crucial. So when I'm in the process of making the project I will consider my choice of clothing and the colours I'm wearing as well as the environment around me.
Colour isloate task
First I used the 'leave colour' effect on my footage.
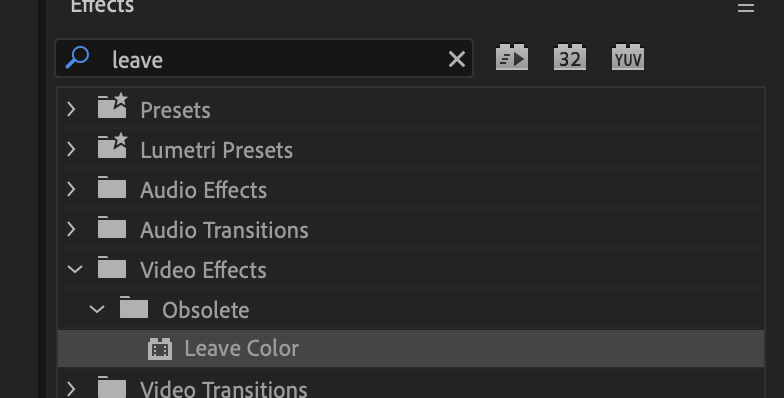
This gave me the effect options to change the highlighted colour and tolerance. Next I chose what colour I wanted to be highlighted, I did this by holding and dragging the ink tool on to a colour in the video what I wanted to stand out.

Then I changed match colours to 'Hue'. Finally I made the 'amount to decolor' 100%. This makes everything but that colour black and white. I also slightly increased the tolerance to 10%.

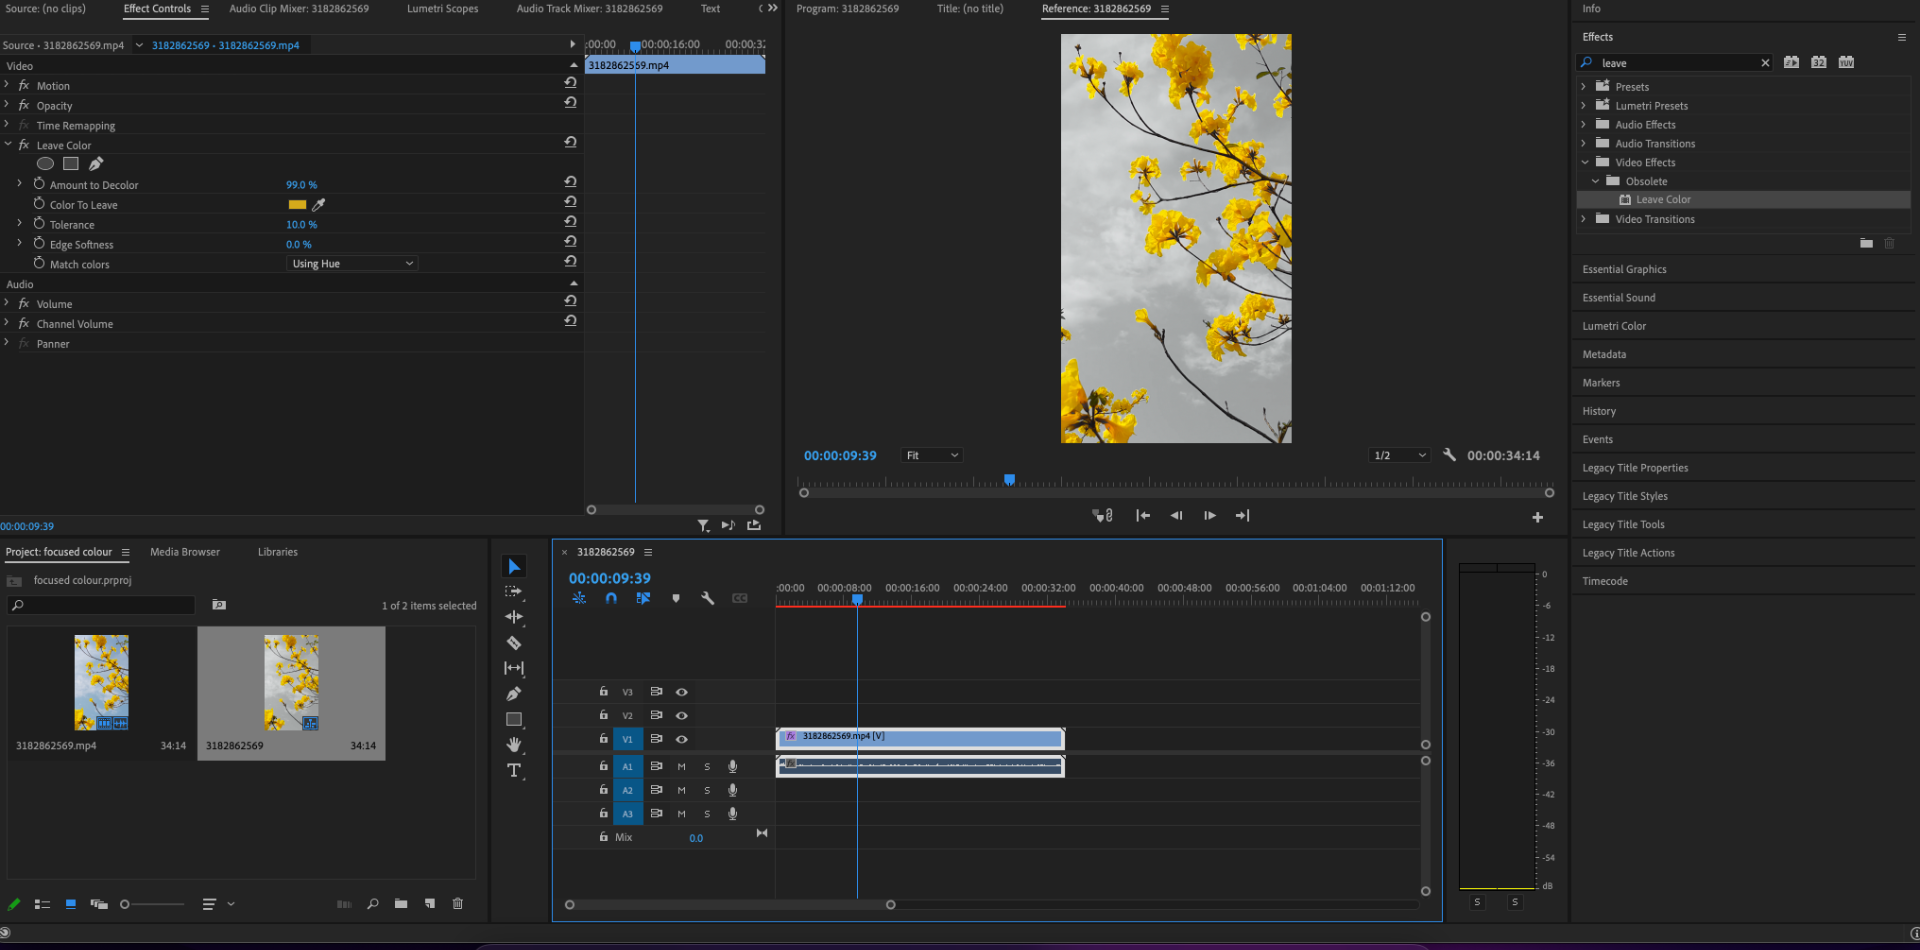
I think this a great useful task that I will definitely. use in the future. This effect is really cool and I think it would be very useful in my music video depending on what piece of music and style I want to use. The only problem I see with this effect is if there's multiple yellows being used in the photo and I want to highlight a yellow. Multiple colours could be coloured that I don't want. So when I film I have to make sure that the main colour isn't being used.
Colour hype task (Adobe After Effects)
In this task I was able to change all the colours in the video. Using the effects in Adobe Premiere Pro.
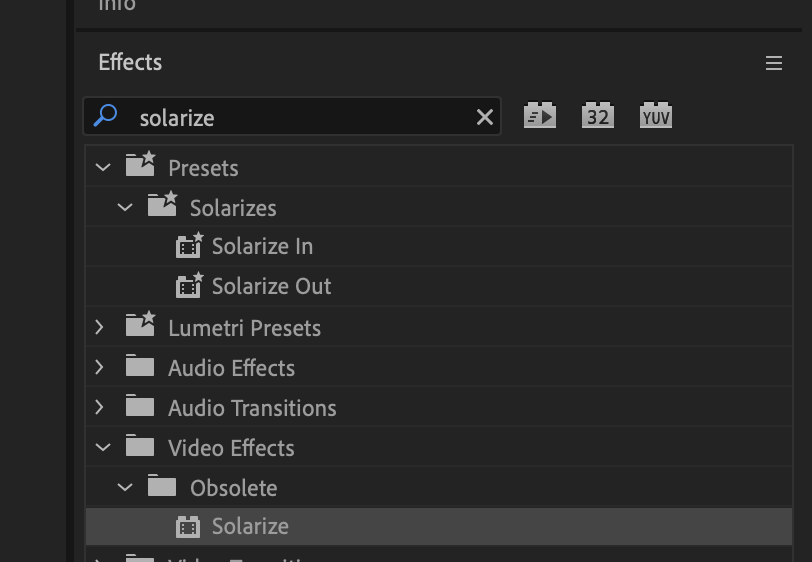
First I equipped my clip with the 'solarize' effect from the search bar. This effect allowed me to change the colours on my video.

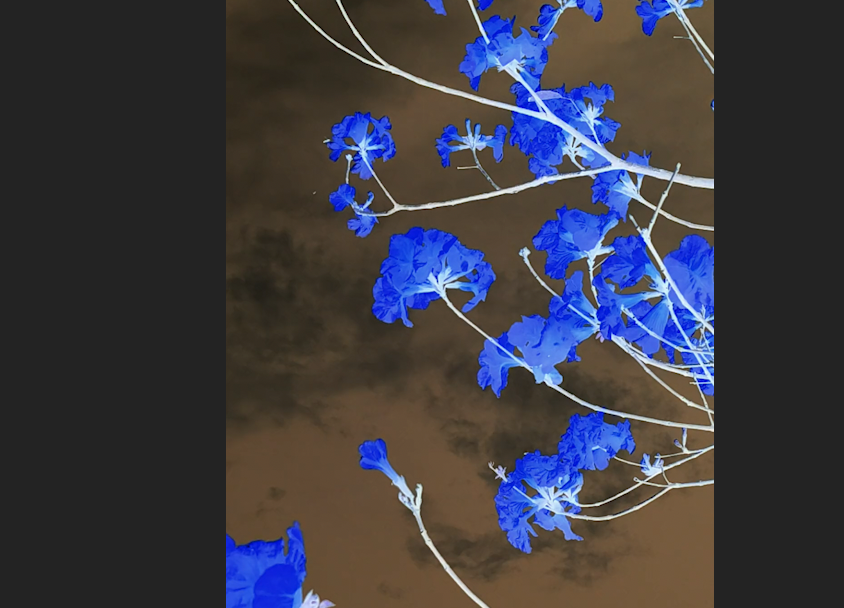
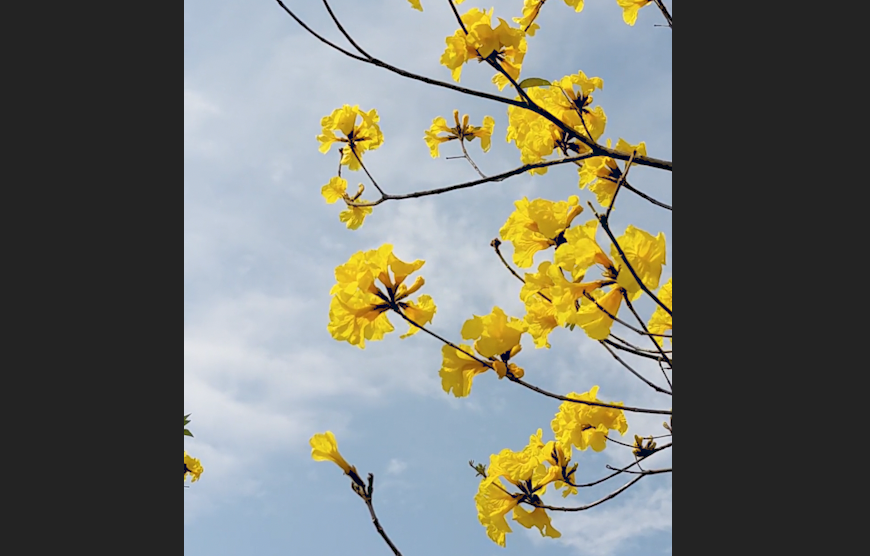
The threshold controlled how much you wanted the colours to change in the video. This was found in effects and controls, as you can see I have the original stock footage on the right and the effect of the threshold on the right.
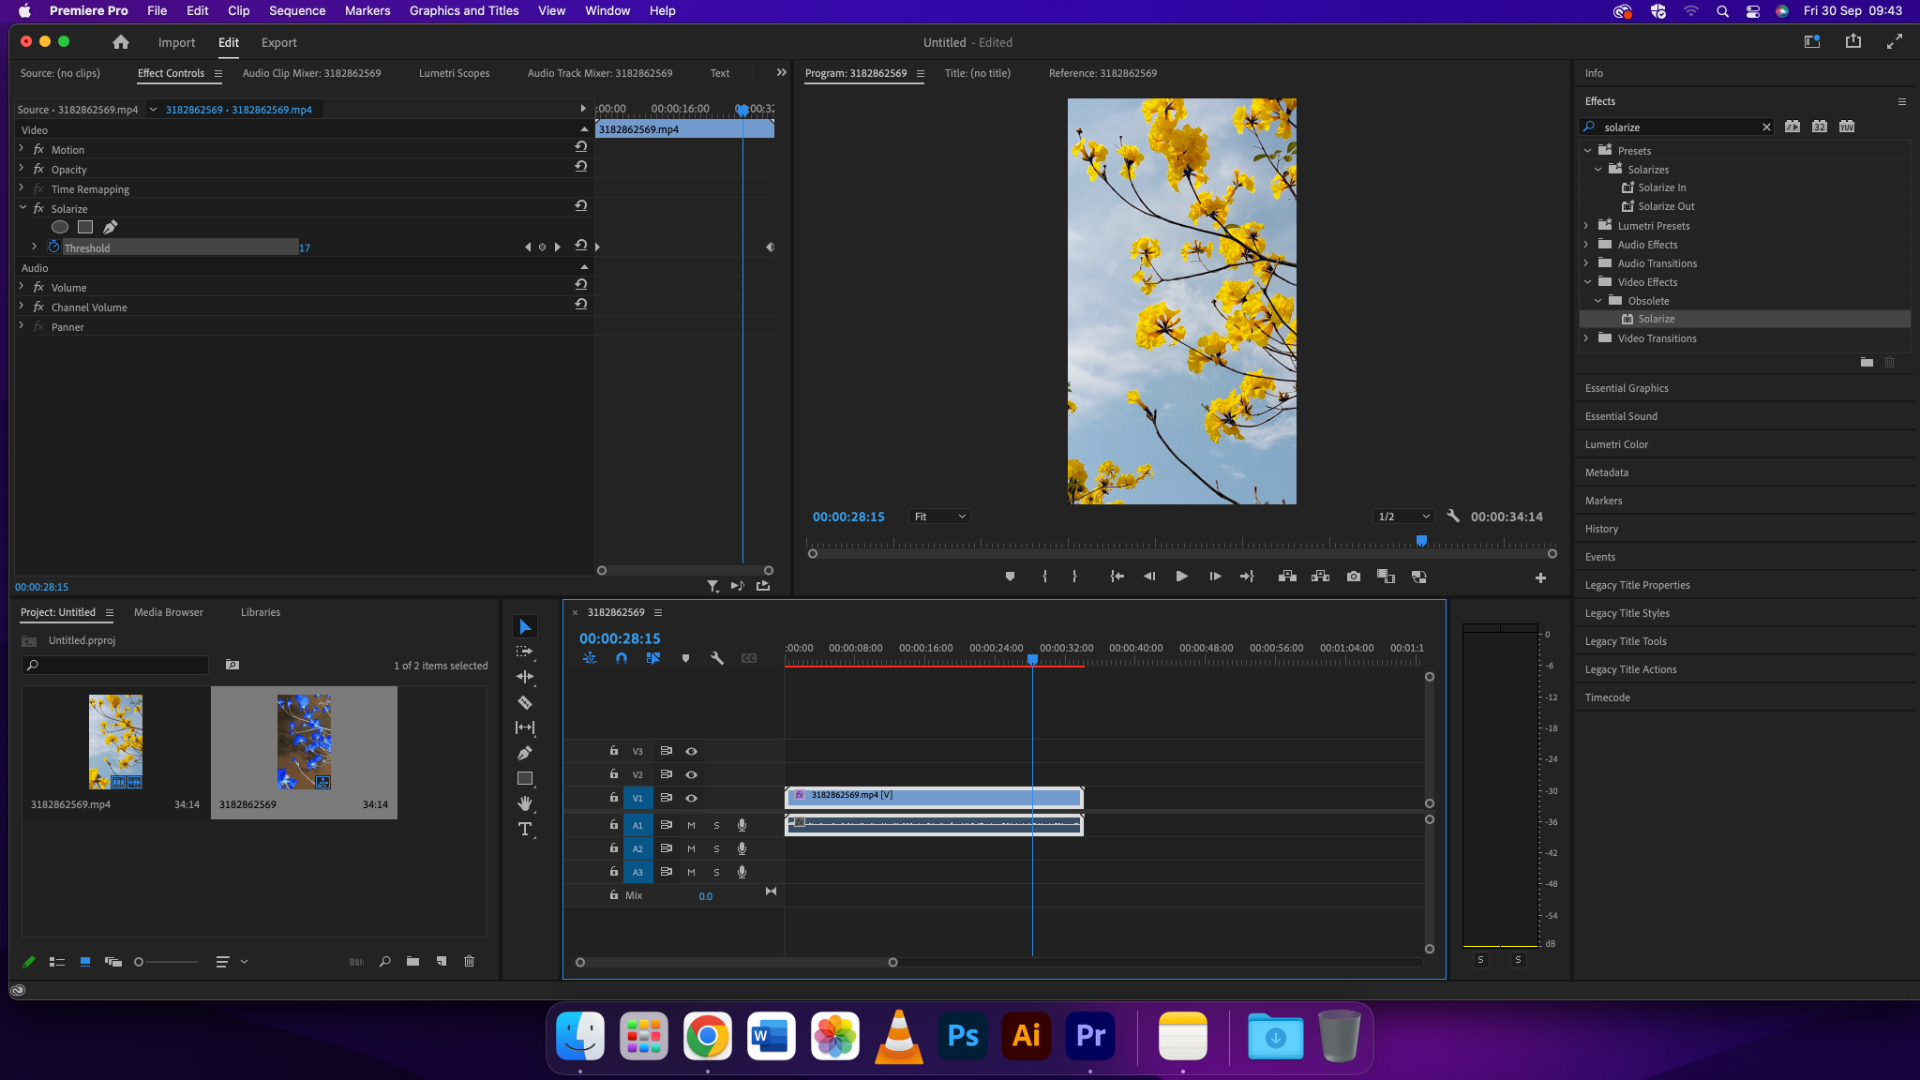
Using the stopwatch tool I made the colours change in a video. I thought it had a cool effect and that made me want to make a video showing the change of colours overtime using the threshold measurement.
This effect is right up my ally, I really like this effect I think it suits with what I'm trying to do in my music video. I want to make a music video that focuses on visuals rather than storytelling. This effects will definitely help with that improving the visuals even more.
Glow line
The glow line effect allows you to use stop animation drawing. I found it really easy to use and wasn't time consuming at all. I can see myself using this for a longer period amount of time to bring out better drawings.
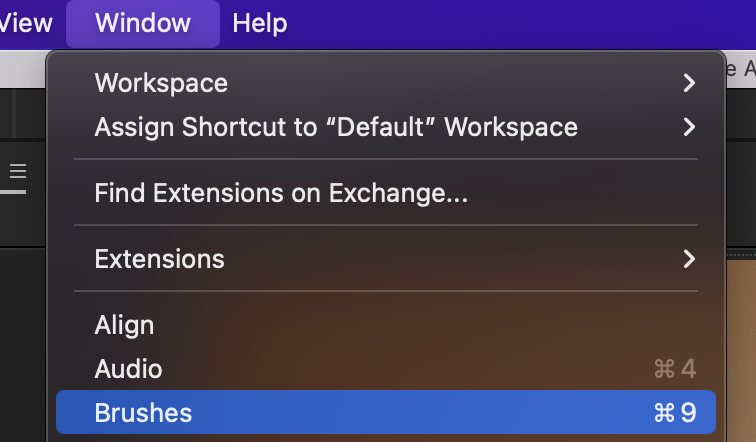
The first thing to do when using the Glow line effect is by going on window and selecting 'paint' and 'brushes'.
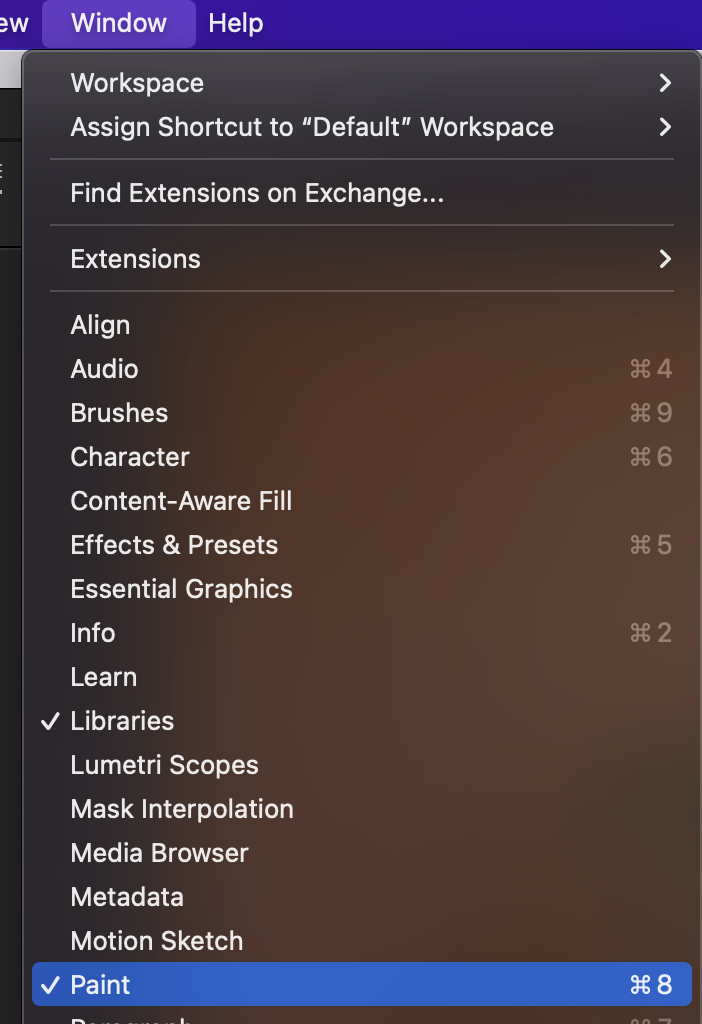

Next you want to select your Adobe After Effects project. This will allow you to paint on to your project/video.
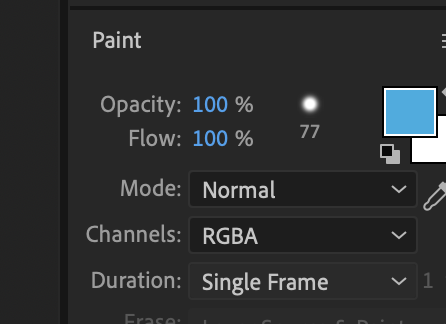
Then change the duration to single frame so that you can make the pain stop motion. This will be on the effects panel.
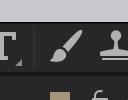
Select the paint tool to a paint on the project and draw
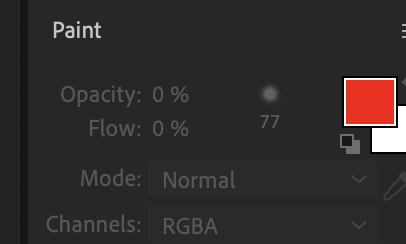
On the effects panel there will be a a box that is labeled paint. Here you can change what colours you want to use. As you can see I chose to use the colour red.
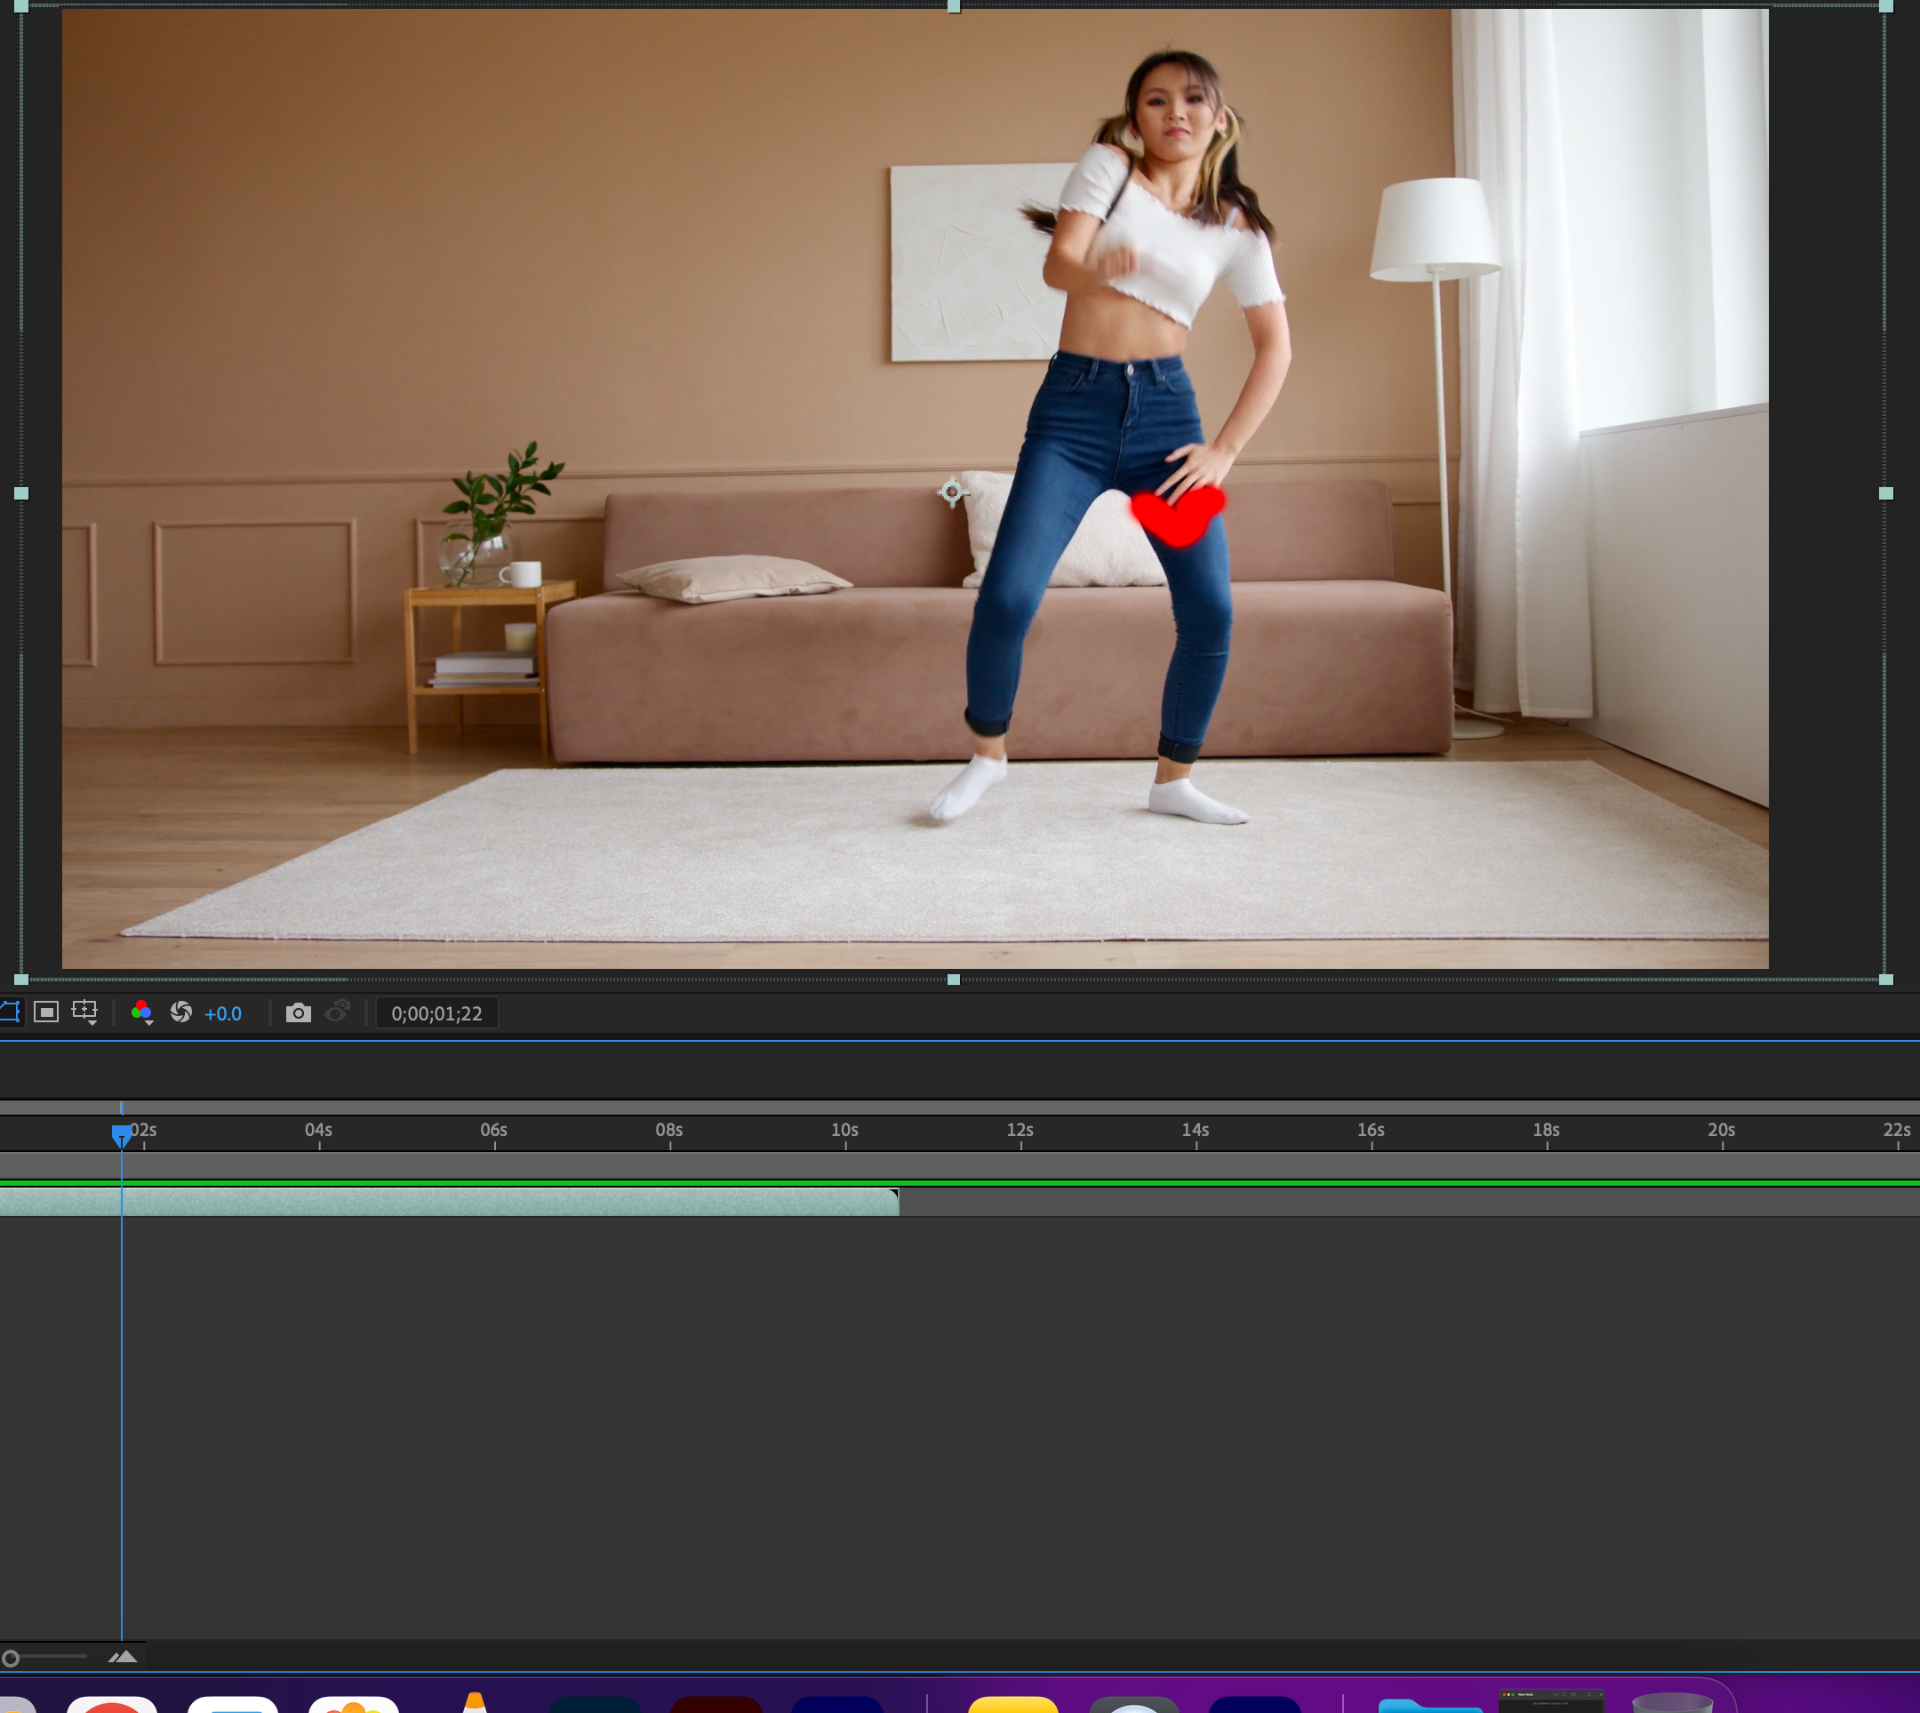
Finally I was able to start drawing by holding left click on to the video. For the stop animation I would draw a little bit and the hold command (arrow). This will skip to the next frame allowing for you to make the animation look like it's moving.
I found this task quite easy and calming to do. The fact that I could spend as much time I want and I could draw anything made the task feel fun. I don't know if I'll use this in a music video because it seems like it will work best with movement such as dancing. Also the style needs to fit. If I were to do a serious grey coloured video it wouldn't really fit with this stop animation.
Mirror split task (Adobe After effects)
To use this you need a video clip to use. The first thing I did was I went on pexels and downloaded a video of people rollerskating. The I searched for the mirror effect in the effects and presets search bar and applied it to my clip. I applied the clip by holding left click and dragging it over to the clip I was using.
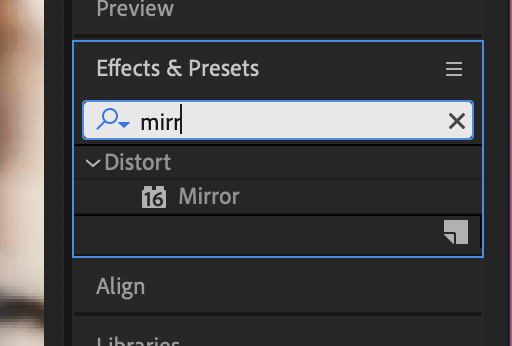
Next I dragged the square box on the right side of the clip towards the left side. Once I did this the clip mirrored itself.
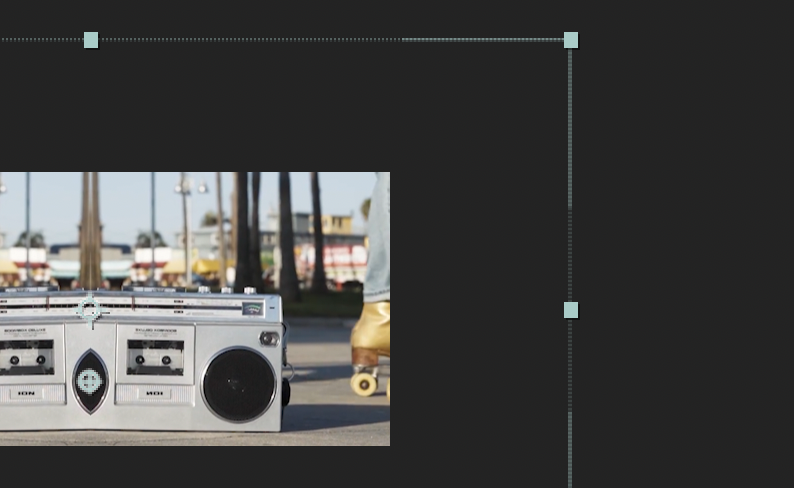
This is an extremely simple skill that I've learnt. . The effect itself is something I'd use twice in my music video tops. I think think this effect will work really well in a music video that doesn't have any narrative and focuses more on the visuals.
I really like this effect and I want to use this in my music video which I think I will make it an interpretive style video. SO the visuals will be representing what the visuals are in the3 song.
Trippy After Effects
This effect makes things seem quite dizzy and unbalanced. I titled it trippy for that reason almost as if someone's been drugged or something like that.
Fist I applied the wide time effect in Effect and presets to the clip.
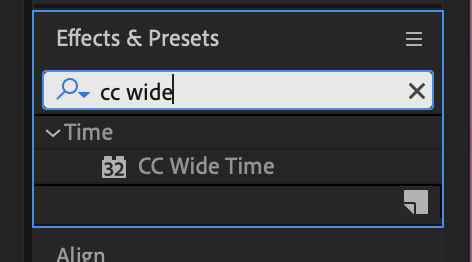
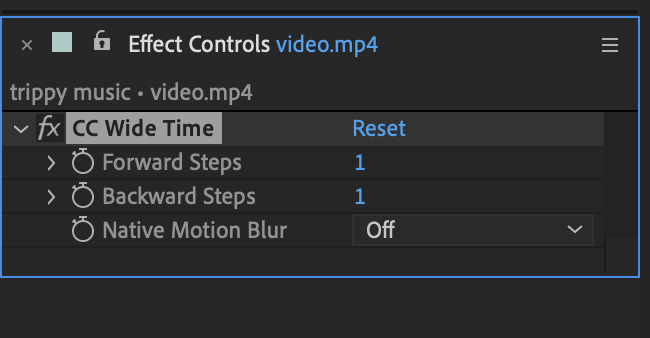
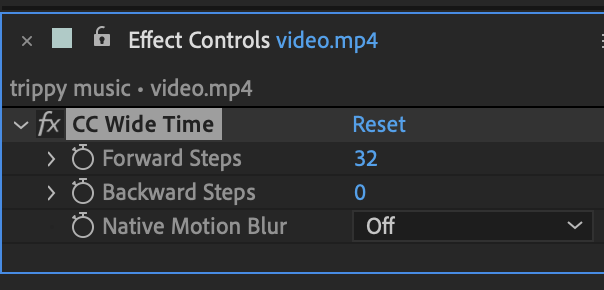
Then I changed the default wide time settings of the clip in effects and controls. This gave the dizzy/trippy effect to the clip. Skipping frames makes it look like the person in the clip has no full control of what's going on.
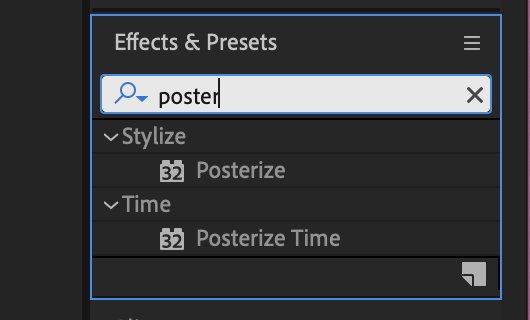
Then I added the posterize effect. This effect makes clips more blurry which only added to the trippy effect.


I changed the frame rate to 7.3 so that the clip almost seems laggy, by slowing the frame rate down. This gave a drunk effect to the clip.
Overall I really like this effect. I think it really works with the dancing clip I used. I don't think I'll be dancing much in my music video, either way I would like to include this effect somehow in my video. I feel like this would be a great effect for someone getting their drink spiked or for someone hallucinating. I really like this and can see this being effective for my music video.
3 point lighting
3 point lighting is key for removing shadows and creating great visuals. We did this last year but it was nice to have a recap as I think it will become crucial when filming our music videos.
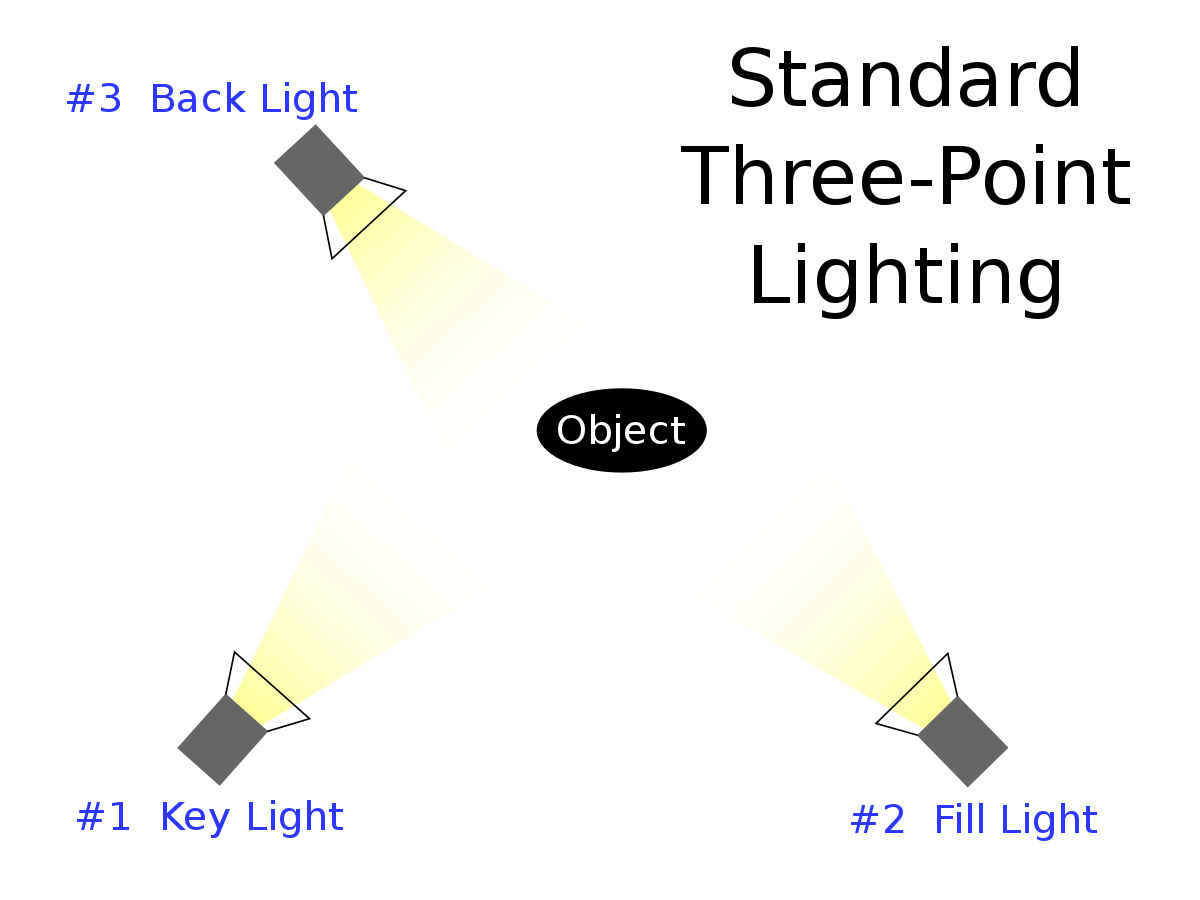
Using this formation for our lights me and my group were able to capture some great photos. We also tried using two of the lights instead of all three of them, each had different effect. Removing the key light would make the subject creepier in a way. As the light is coming from behind not the front shining light on only half of the subjects face.
I think this will be important for me when filming the music video. 3 point lighting is so useful in removing shadows. In this lesson recap we were also taught about the different filters we can use over the lights to change the colours. This links in to the usage and meaning of colours.
Each colour can convey different emotions and feelings. For example blue can convey the feeling of being cold or calmness. Where as red can mean warmth, anger or health. It's different for other cultures.
'Violet city' inspiration task
What I like about the song Violet city by mansionair?
I really like the colour usage used in the song. The colours used consist of purple (violet), black and white. I think this was done on purpose to fit the title of the song. I think colour choice is really important and the usage of these colours makes the music video very unique. The video is a performance mixed with some nice visuals but the violet colour is only when the band are playing. This is something that I want to include in my video. I'm choosing this song to be used for my music video so I need to take some inspiration form the original video. I think I could add these colours in Adobe Premiere Pro quite easily.
Podcast task
In class we were put in to three groups consisting of roughly 8 or 7 people. In our groups we had to think of a topic about music that we could talk about. My group thought it would be easy to talk about TikTok and the impact of it on music. The group was torn between this topic and football but we went with TikTok in the end. The production involved two cameras, two tripods and a mic.
I enjoyed having this experience working in a group, we had a lot of funny and just tried to enjoy the task we were given instead of rushing to get it done. I had so much fun filming and coming up with ideas for the podcast.
The editing for this video was super easy and fun to do since there was so many moments I could've added in. I chose these moments because I thought they were the most relevant to the topic we were given to talk about.
Green screen and corner pin
In this task I will be using the green screen to display a background as well as using the corner pin to stretch a video so that it can fit on to another green screen.
1) the first thing to do when using a green screen after adding your images and videos is to apply the Ultra key effect. This effect will allow images/videos to cover the green. When using green screens this is the tool in Adobe that will allow you to add backgrounds.
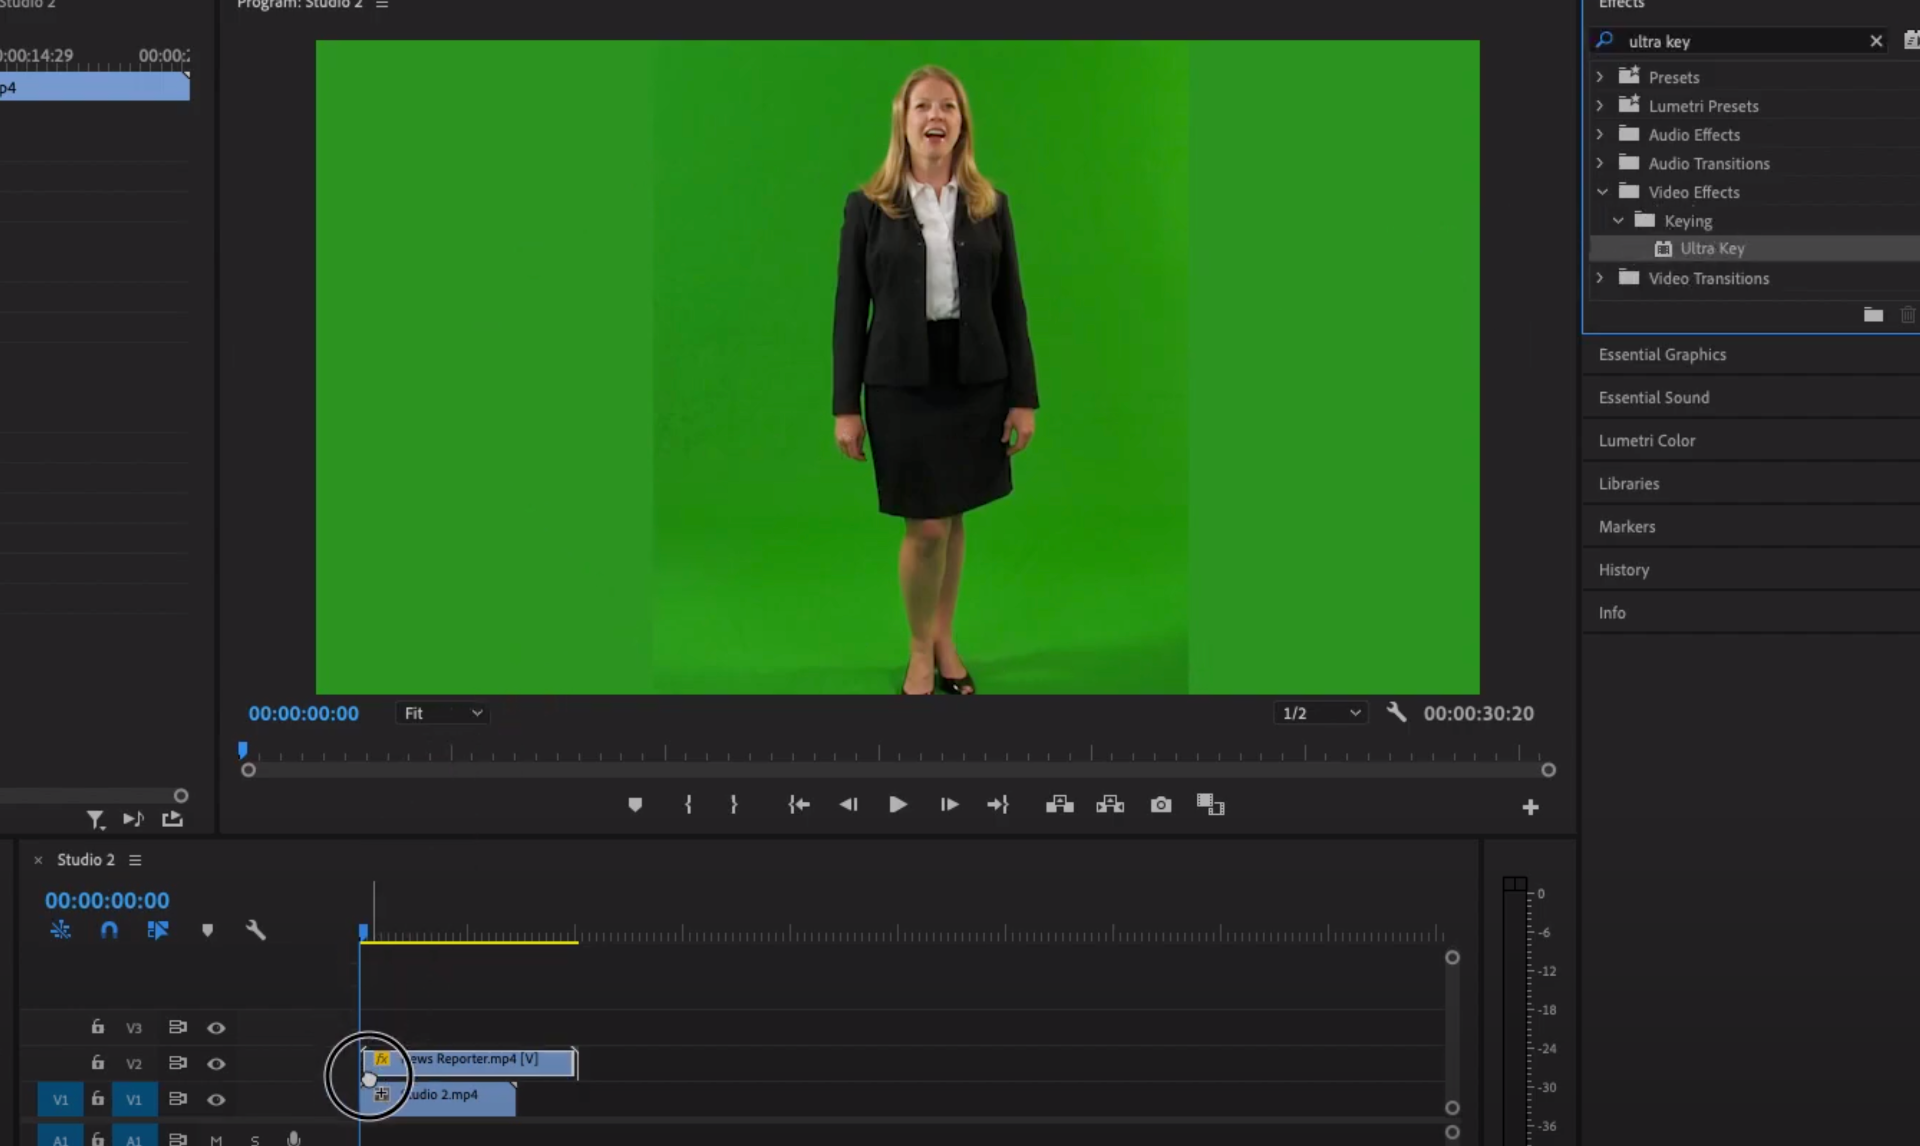
2) next change the key colour for the green screen to the colour of what is going to be displayed. This will allow for the background to come through.
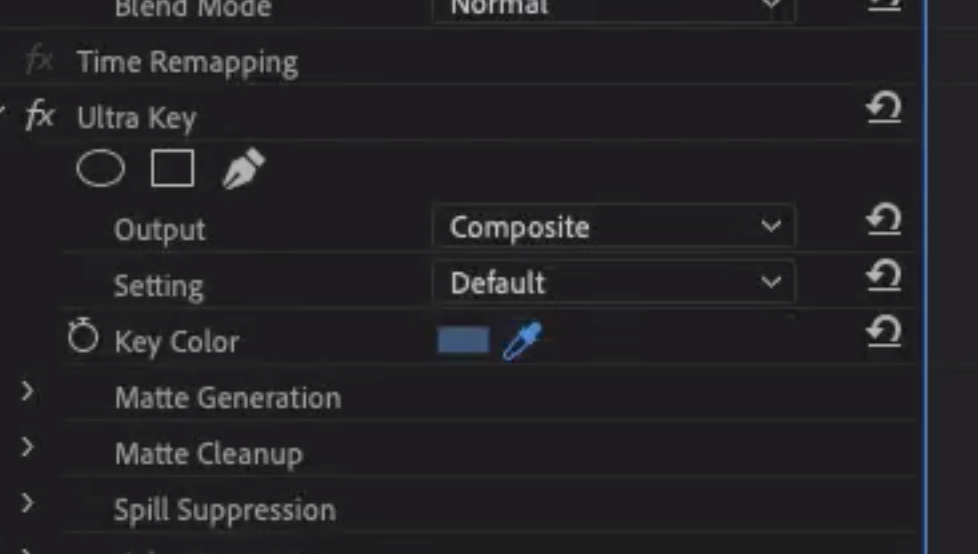
3) make sure the image you want to come through is on the time line below the green screen so that it can come through. Otherwise nothing will come through for the green screen.
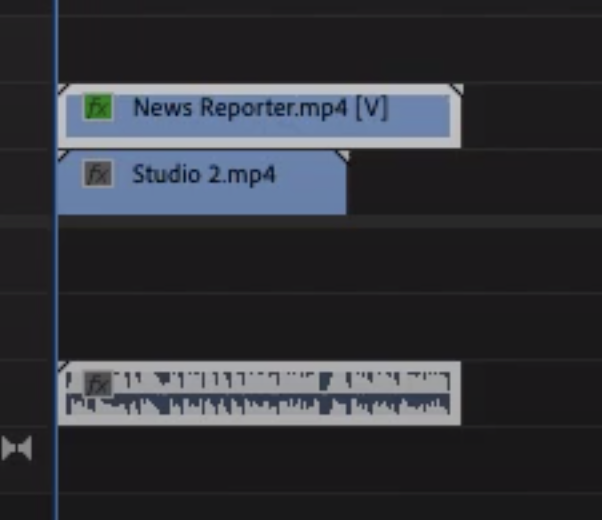
4) Hopefully this should work and allow you to make something that look like this:
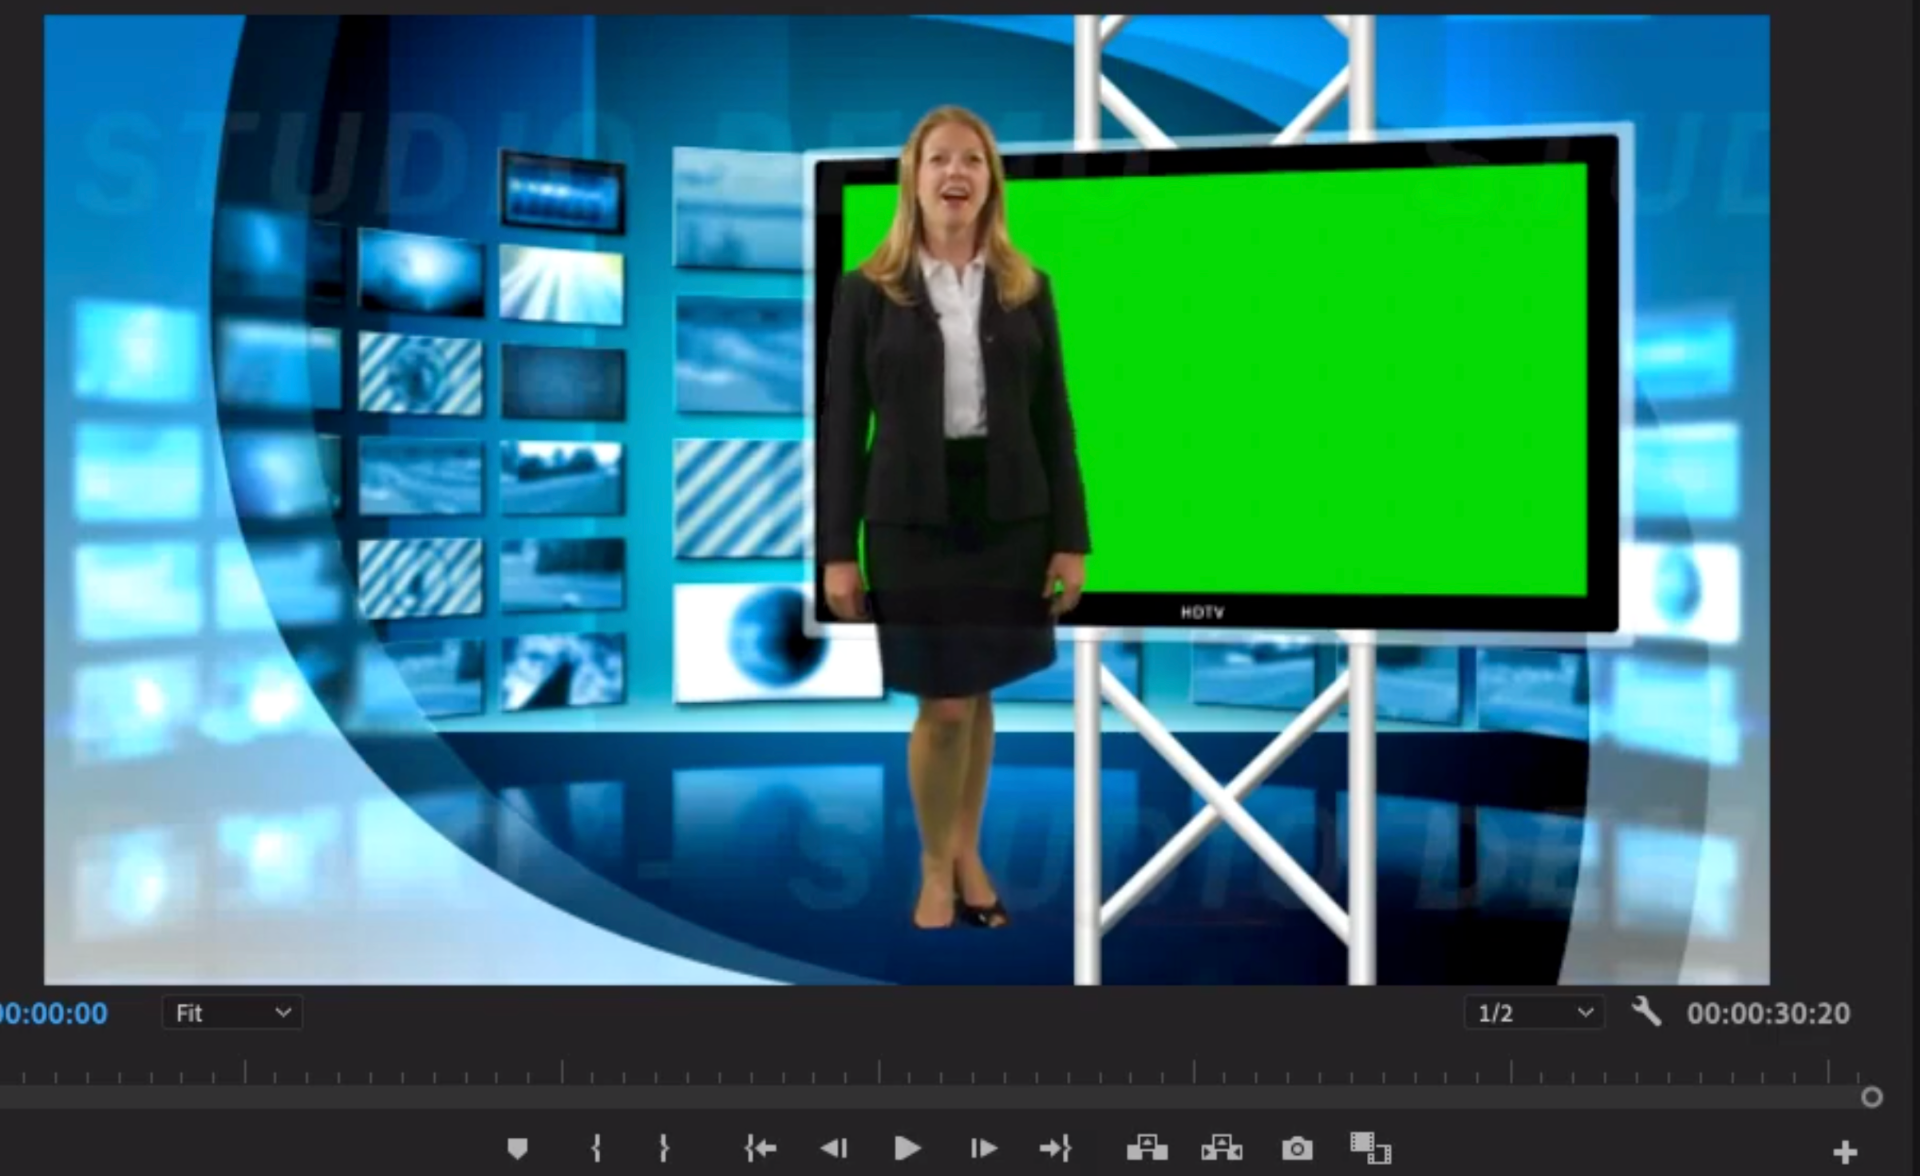
This short yet easy to use technique is very effective. A lot of news stations use green screens to create a background similar to this. This is an extremely effective tool. I've used this last year on multiple projects but decided to do it again as a recap. I think this is an amazing effect and has infinite possibilities with what you could do with it.
To make it more realistic we had to add a reflection in this task. Using a tool called vertical flip on the woman. This would turn her upside down. I could use this and place it below the other one of her and make it look like a reflection. I was taught to turn the opacity down so it isn't opaque and more transparent. This really helped the background look more like a news room.
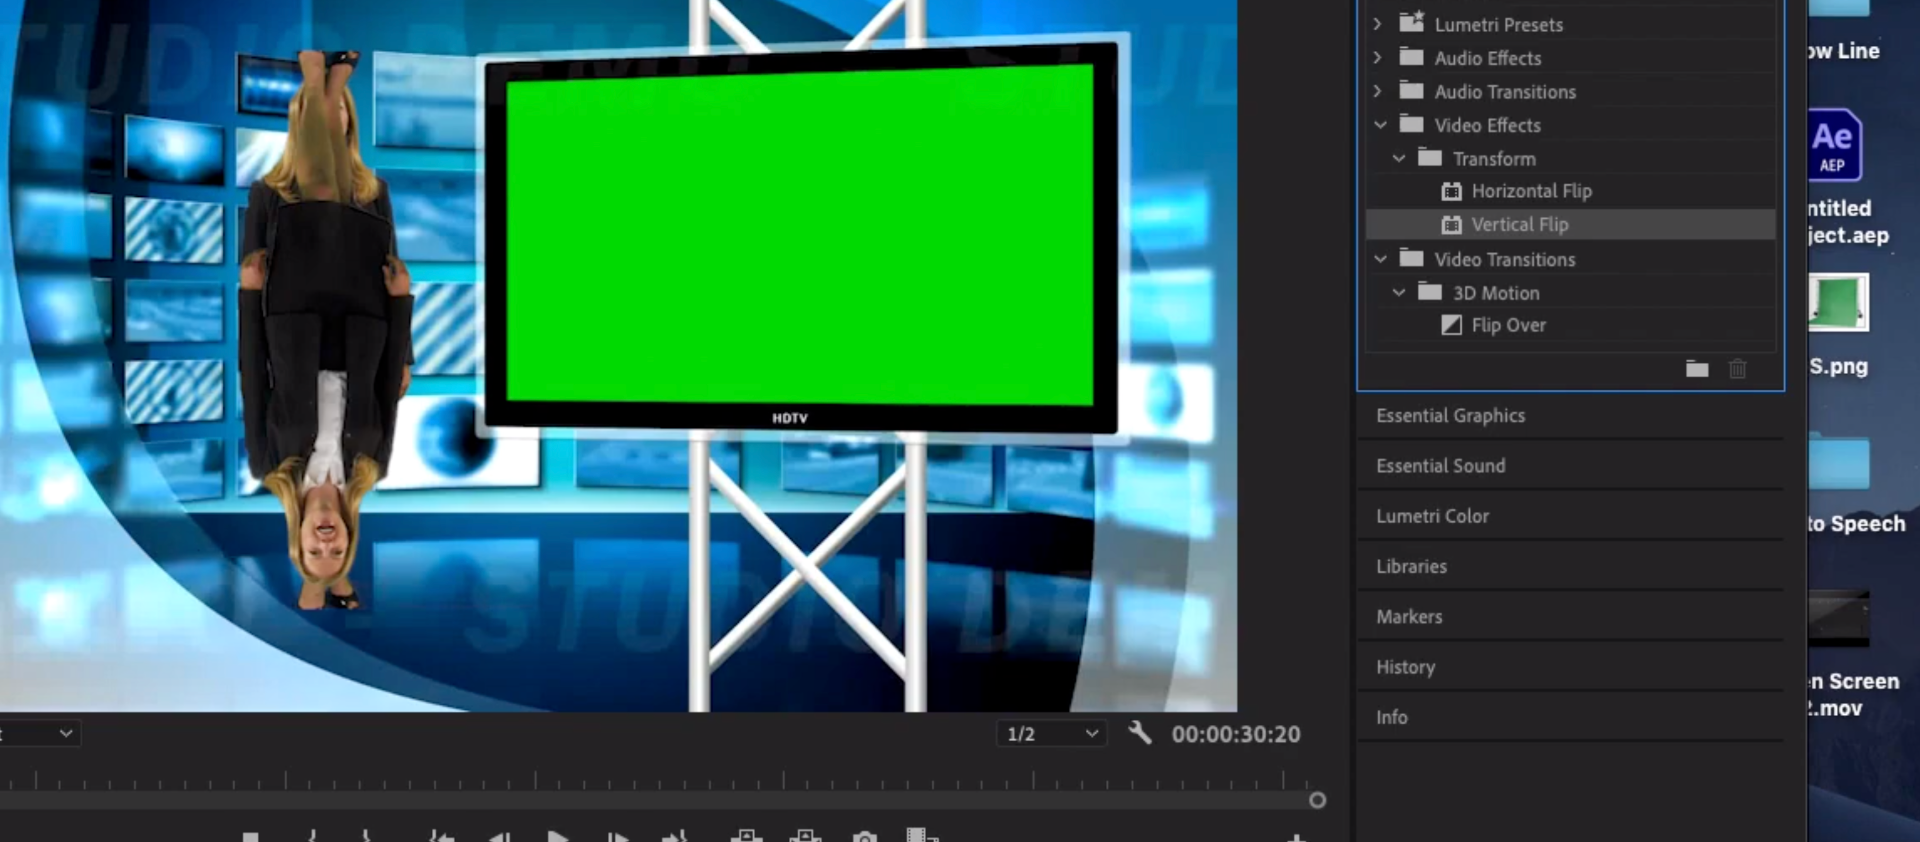

This nice addition to the green screen task, made it more professional. This is something that was needed to boost the look of this task.
One more thing I was taught in this task was using the corner pin tool. This tool allows you to stretch images, I used this tool in this case to stretch the image so that it can fit on to the tv display.
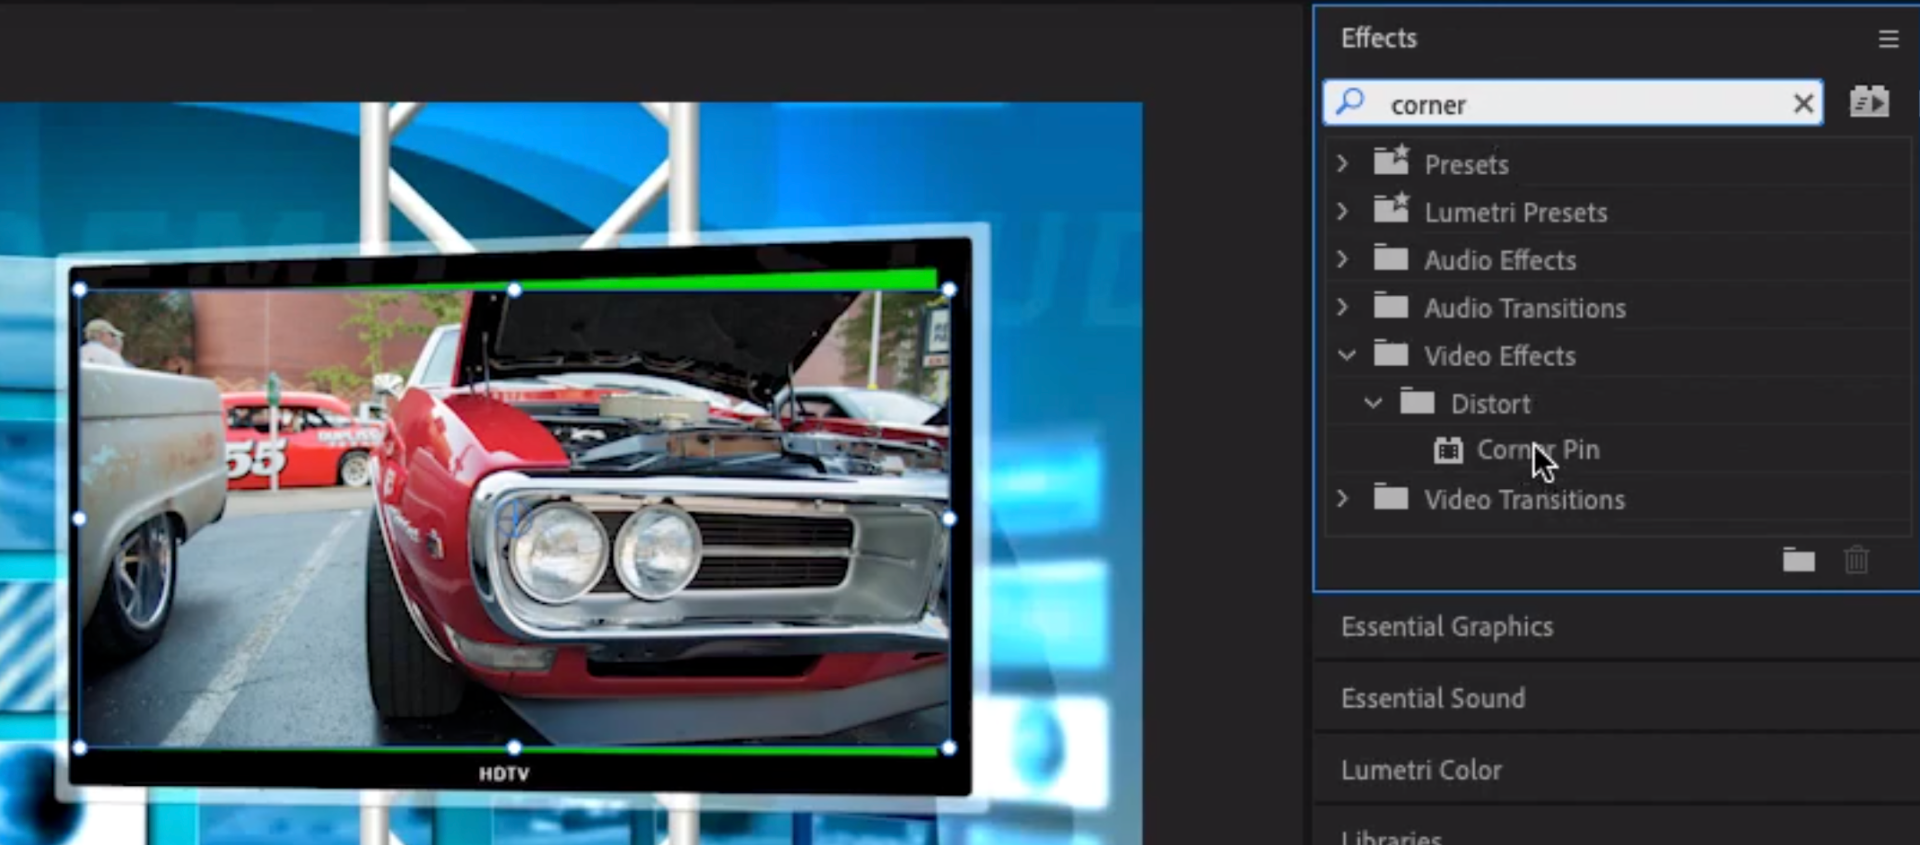
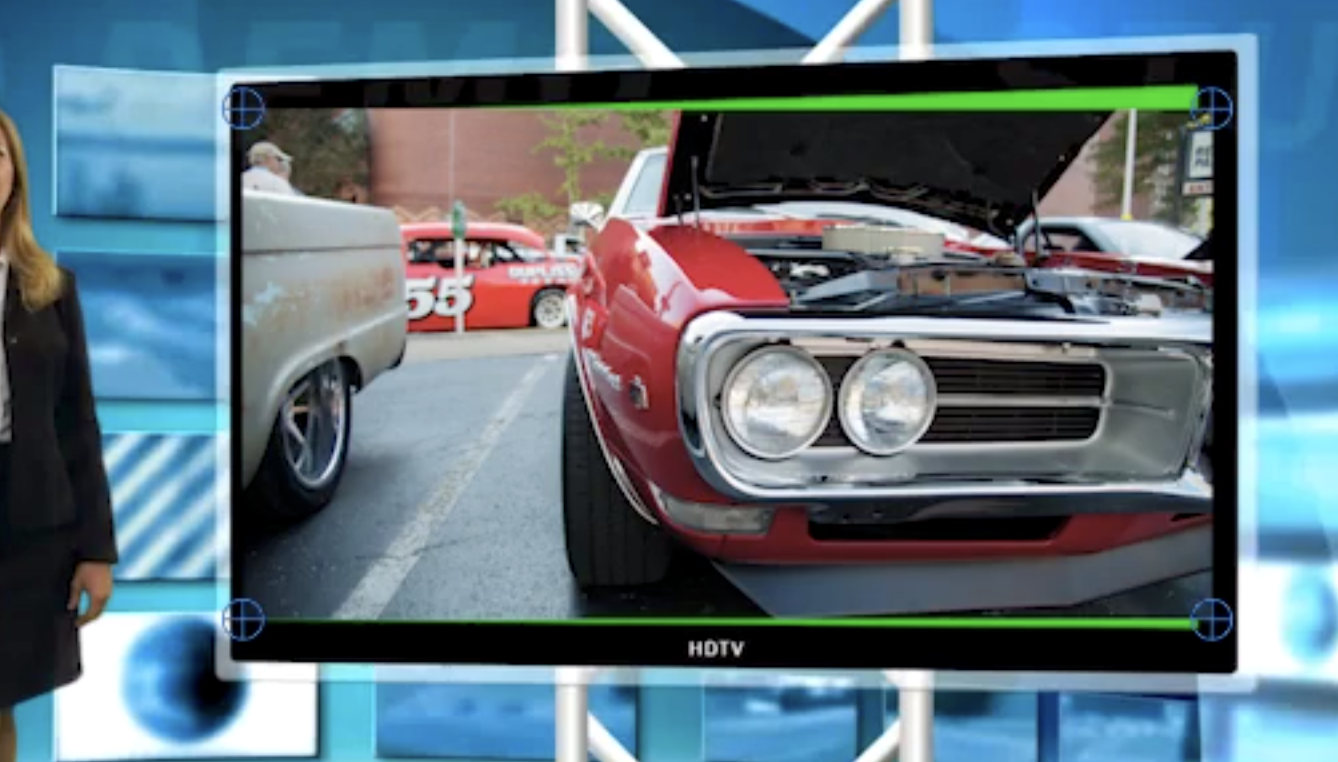
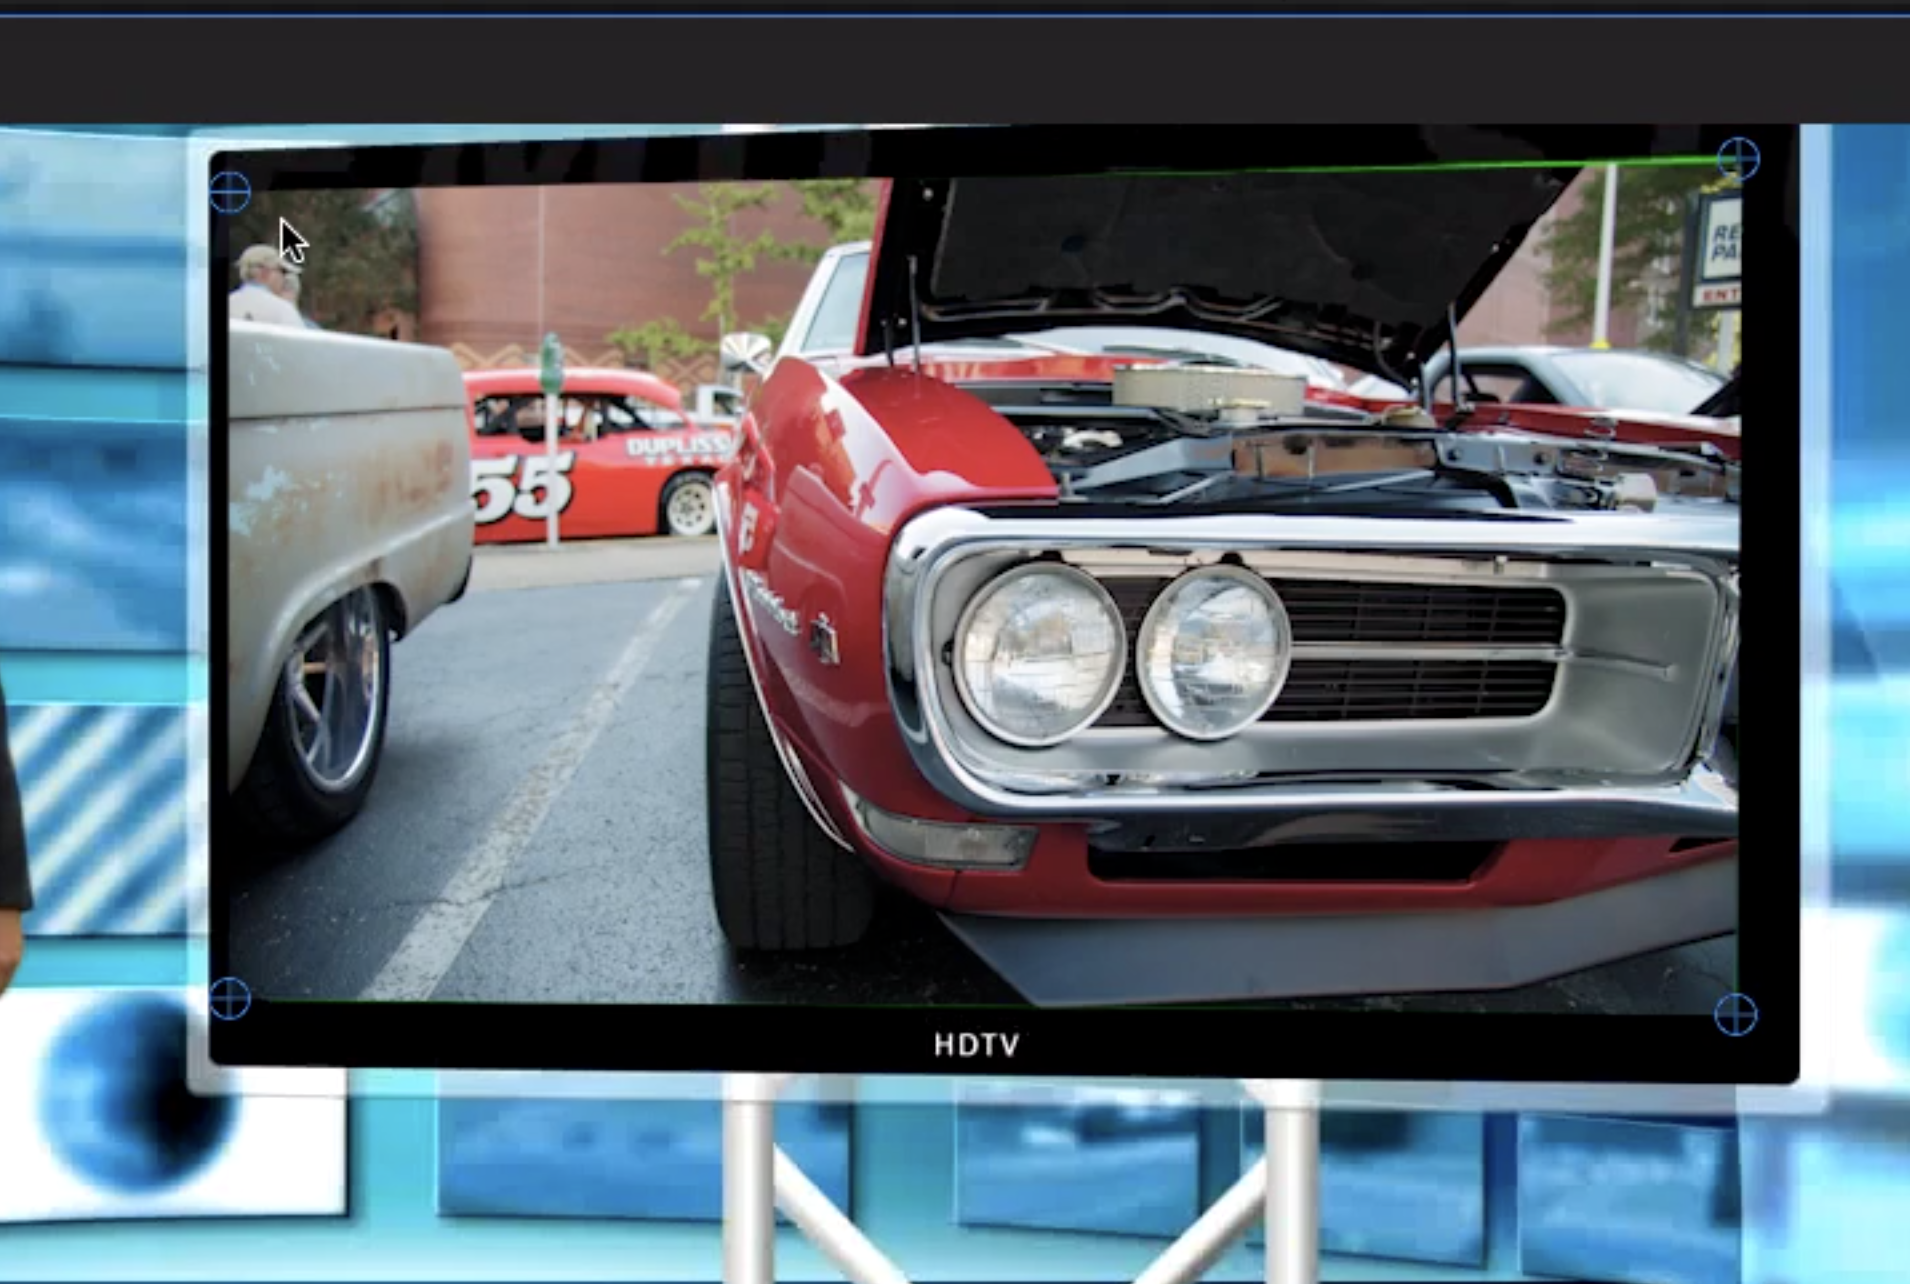
For a simple purpose I didn't know about the corner pin tool before this task. I will definitely use the corner pin in the future. I think it really helped in this task, especially since I can use this on videos not just photos.
Alien puppet task
The purpose of this task was to turn a still image of an alien in to a moving live character. WE would make the character move body parts creating a nice animation, this is what the final outcome looked like. The process of making these clips is slow and very time consuming, this is why I was only able to make a two second clip. The reason for this is because each piece of movement is made every few milliseconds. The style of animation s very similar to stop animation, tweaks have to be made to the puppet/subject in small amounts of time to create this moving effect.
The first thing we did was gather the images needed for this task. In this task I used an image of an alien as well as a space background image. Next I used the puppet pin position tool on my alien image. This would create dots that I could use on this image to build a skeleton for my animation puppet.
When using the select tool you can drag the points of the character around and stretch sections of the body to make it move. You can also press the stop watch button to record the movements of the character. By making small movements every few frames the character will begin to look like it's moving on its own for the video.

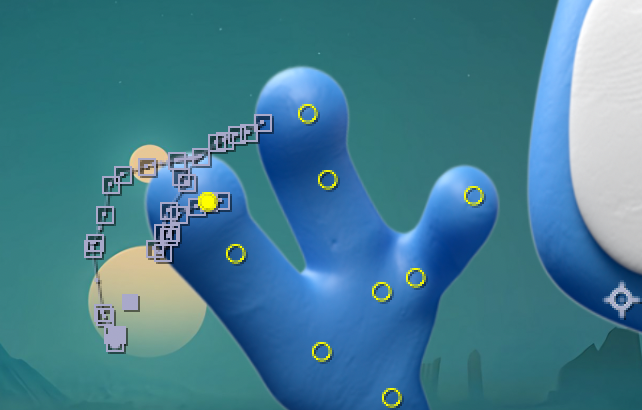
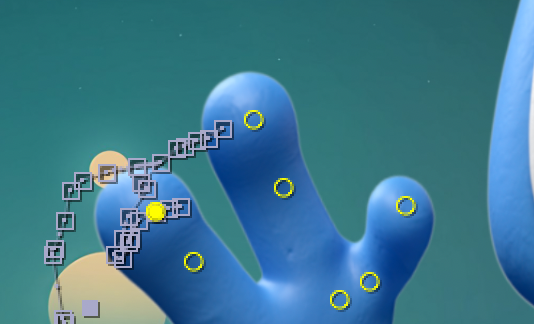
These movements as you can see leave squares that link up, this shows that the movement has been recorded. The problem with animating is that it's a long process to make. Despite there being a lot of squares there isn't too much going on, the video I made is only 2 seconds long. This just shows how demanding and time consuming this style of filming is.
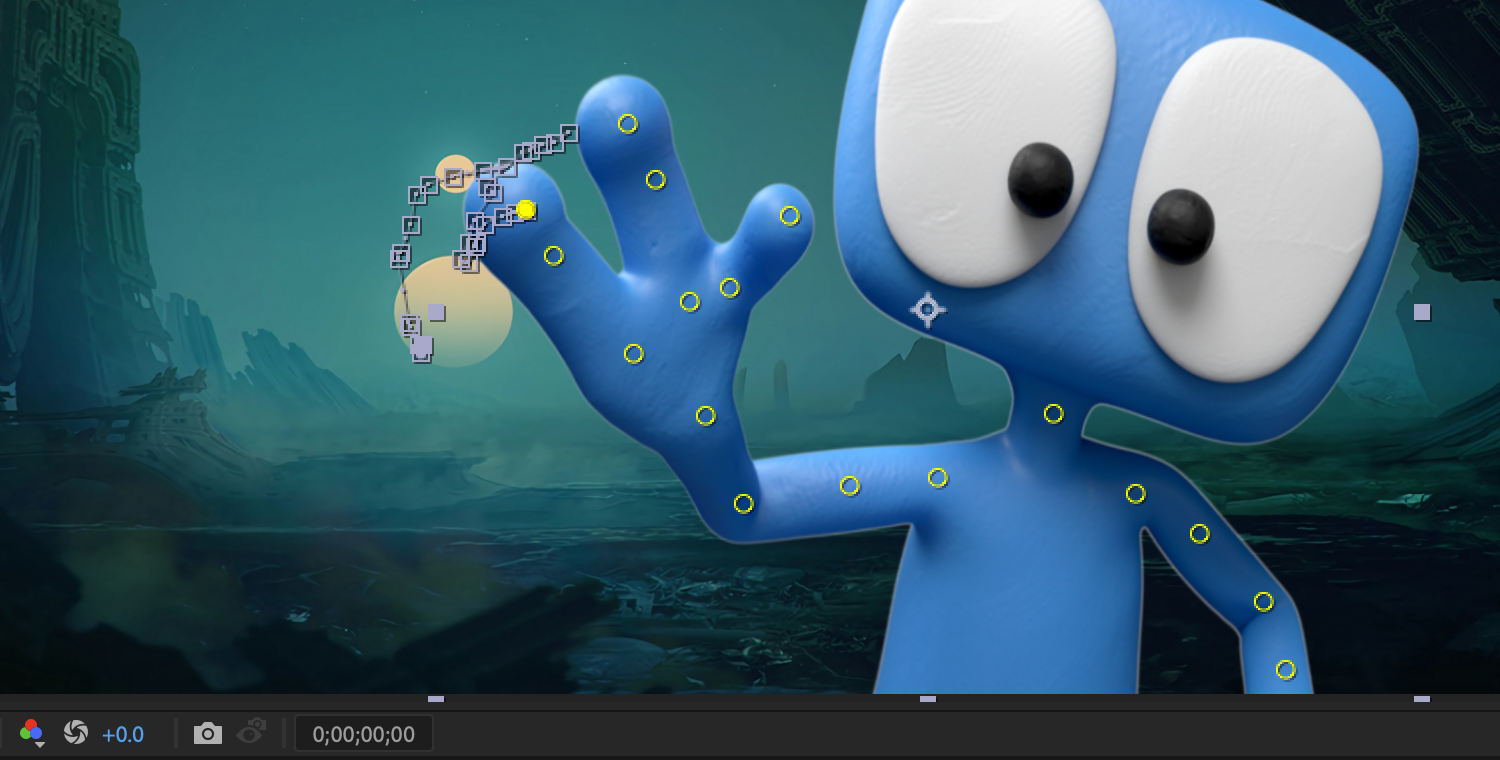
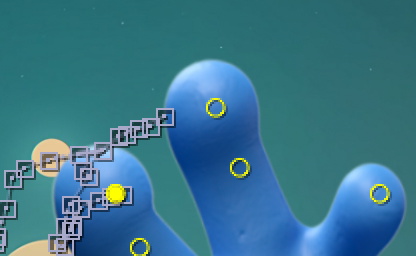
The three images below are separate frames that have been taken from the video. There isn't much difference in the images. The thumb probably has the most noticeable change in these frames. Minor changes are made in each frame so that the animation can look more natural. Nothing big will happen in a small amount of frames because it will look weird for the final video.
Overall, I really enjoyed this task. This is something I found really interesting and didn't consider was possible. Turning a normal 2D image into a fully animated doll was something I didn't think was possible in Adobe After effects. At the time of typing this I'm approaching the deadline for my music video so I can't say for sure that I'll be using this in my music video. I already have my idea and have just shot the footage needed. Nevertheless, this was an enjoyable class task that I absolutely enjoyed doing. Maybe in my next projects I could use this.